

Branches
A Branch is a part of a specific Franchise group. Usually, branch information will only be accessed by Branch management and is not usually applicable to all users. In this section, we will cover an overview of the Branches section and how to edit or update a specific branch. Branches show an overview of how the branch is performing as well as all agents within that branch. It also shows how many alerts have been sent from that branch and a full overview of all listings pertaining to that branch.
Branches Overview
All branches within a specific franchise will be listed on the Branches summary page, shown below.
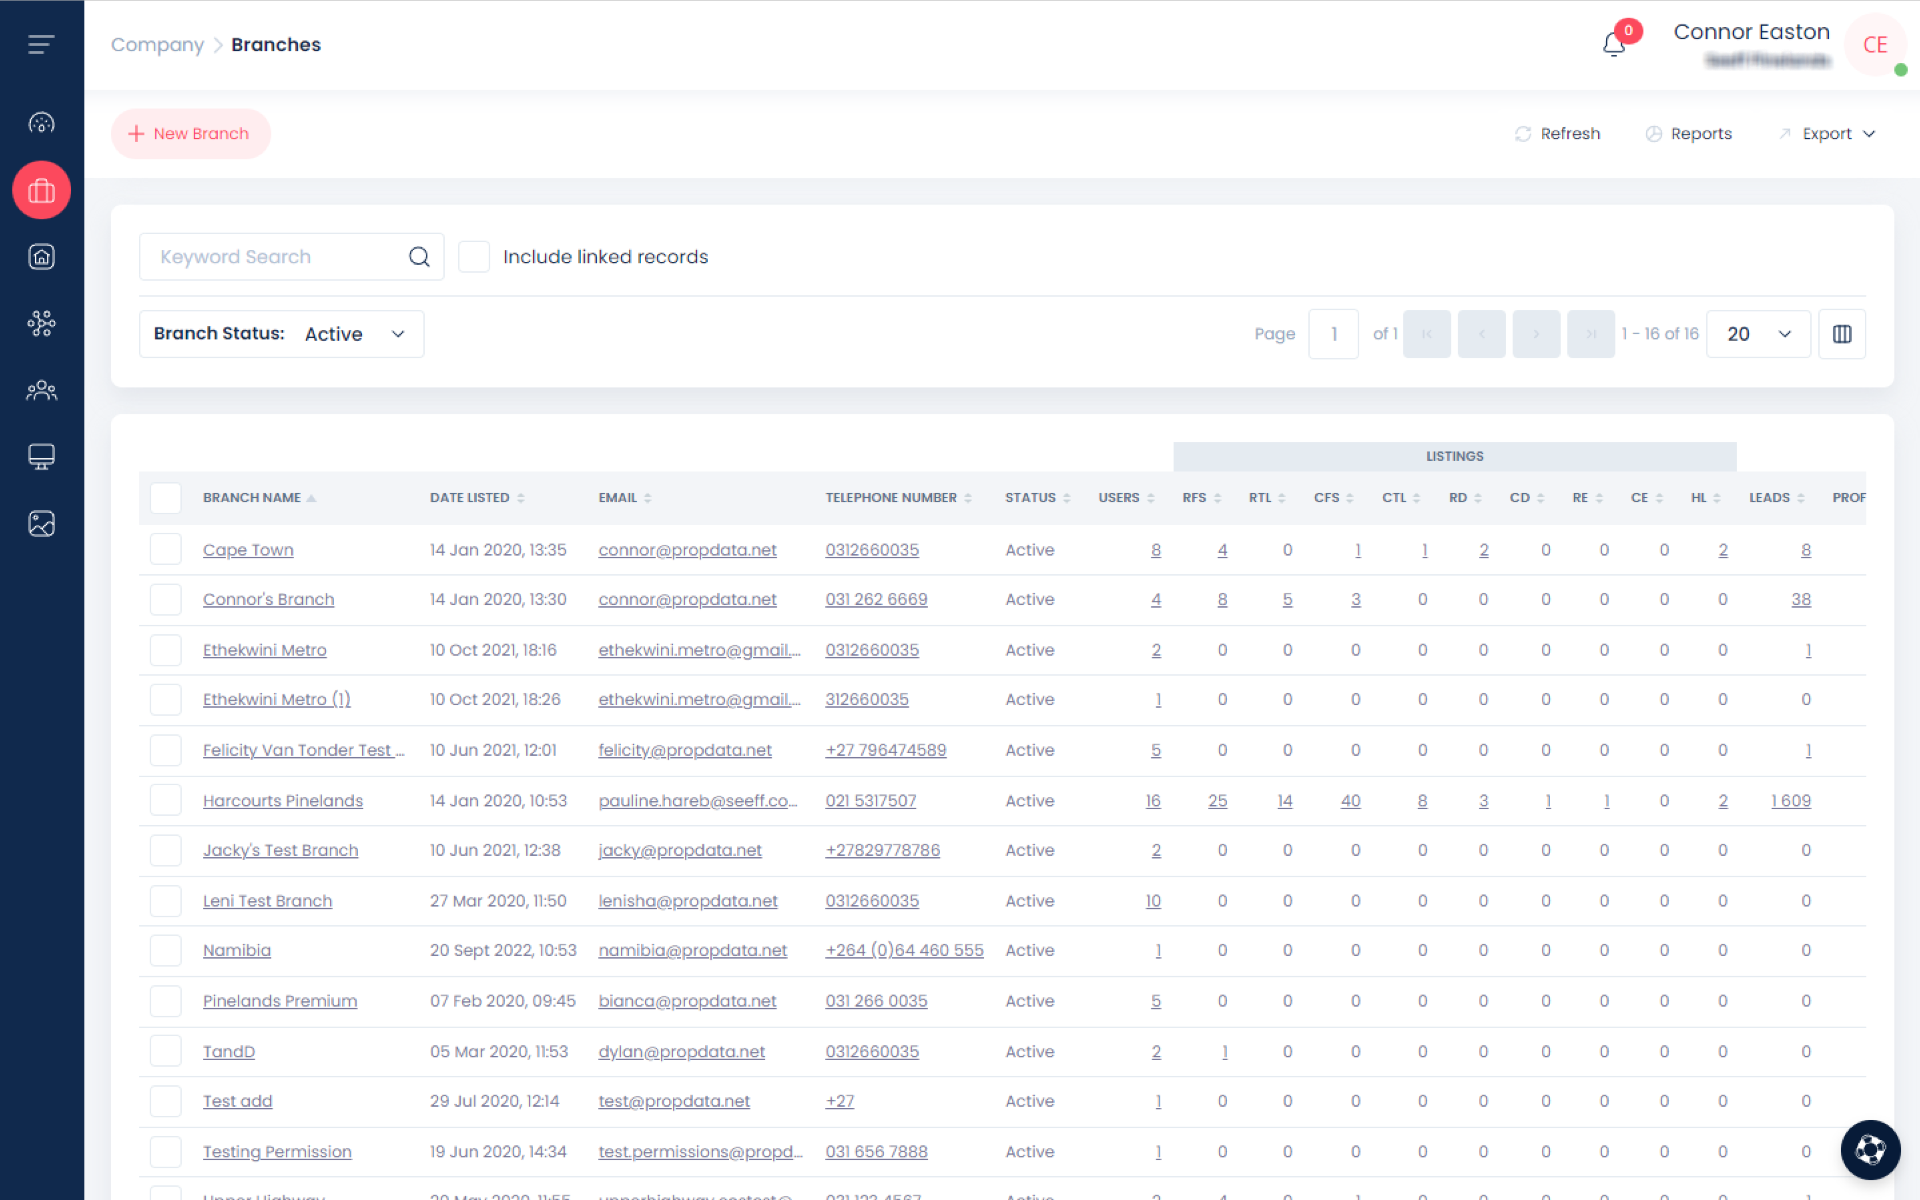
Keyword search
On the top left you will see the Keyword Search bar (pictured below). Here you can search for any branch with the ref number, keyword or tag. You can also filter your search by using the Branch Status dropdown and selecting either Active or Inactive listings.
Activity tabs
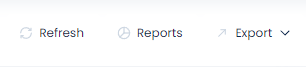
On the top right of the Listings summary page, you will see three activity tabs, as shown below. These are Refresh, Reports and Export.
Refresh
Clicking Refresh will refresh the summary page with any new listings that have been created.
Reports
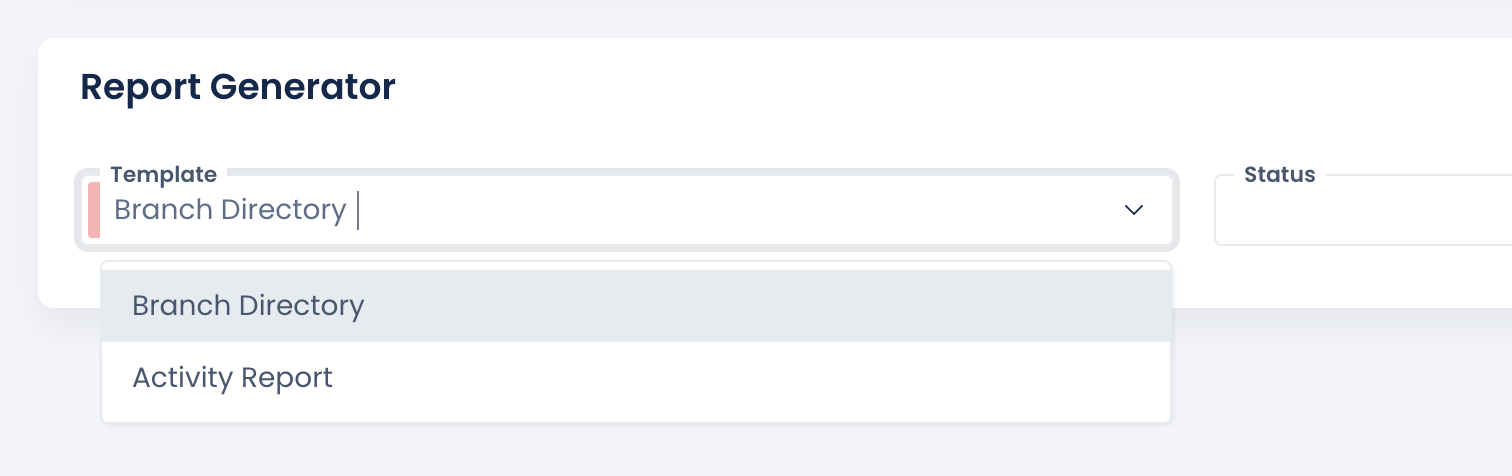
Clicking Reports will allow you to generate a Branch Directory or Activity report. When you click on Reports, a new form will open up, as shown below. From this dropdown, select the report you wish to download.
Export
The Export function allows you to download an Excel or PDF version of selected fields or all fields you have selected or you can download a complete summary of all the records on the system. The export tab will open a drop-down, showing the options available, as shown below. Read more about the Export function here.
.png)
How to Add a New Branch
To add a new Branch, start on the Branches tab and simply click on New Branch

Next, fill out all fields in the form that follows. Remember to fill out as much information as possible. Filling in the required fields, highlighted in red, is mandatory.
The form will appear like this:
.png)
How to edit an existing Branch
When you have selected the Branch, a new menu will appear on the top right corner that looks like this:

Edit button is where you will go should you want to edit any Branch information.
When selecting Edit, a new form will appear, shown below. From here, you are able to edit all information on the Branch. When you are done, remember to click the Save Branch button on the top right of the form.
Note: all of our add and edit forms are exactly the same to keep things simple select a specific branch, put a tick in the box on the left side of the branch name, which will then highlight that branch
.png)
View
If you click on the View tab, it will provide a drop-down with 2 options - view details or view activity. Details will include things like branch contact details, branch management names, branch location etc. Activity will show all the activity and updates made on that branch in real time.
The Branch Dashboard
On selecting a Branch, the following additional options can then be selected from the menu, shown below. First of which, is the Dashboard.

The dashboard will provide you with a summary of all information pertaining to what you are viewing. In this case, your Branches. It will look like this:
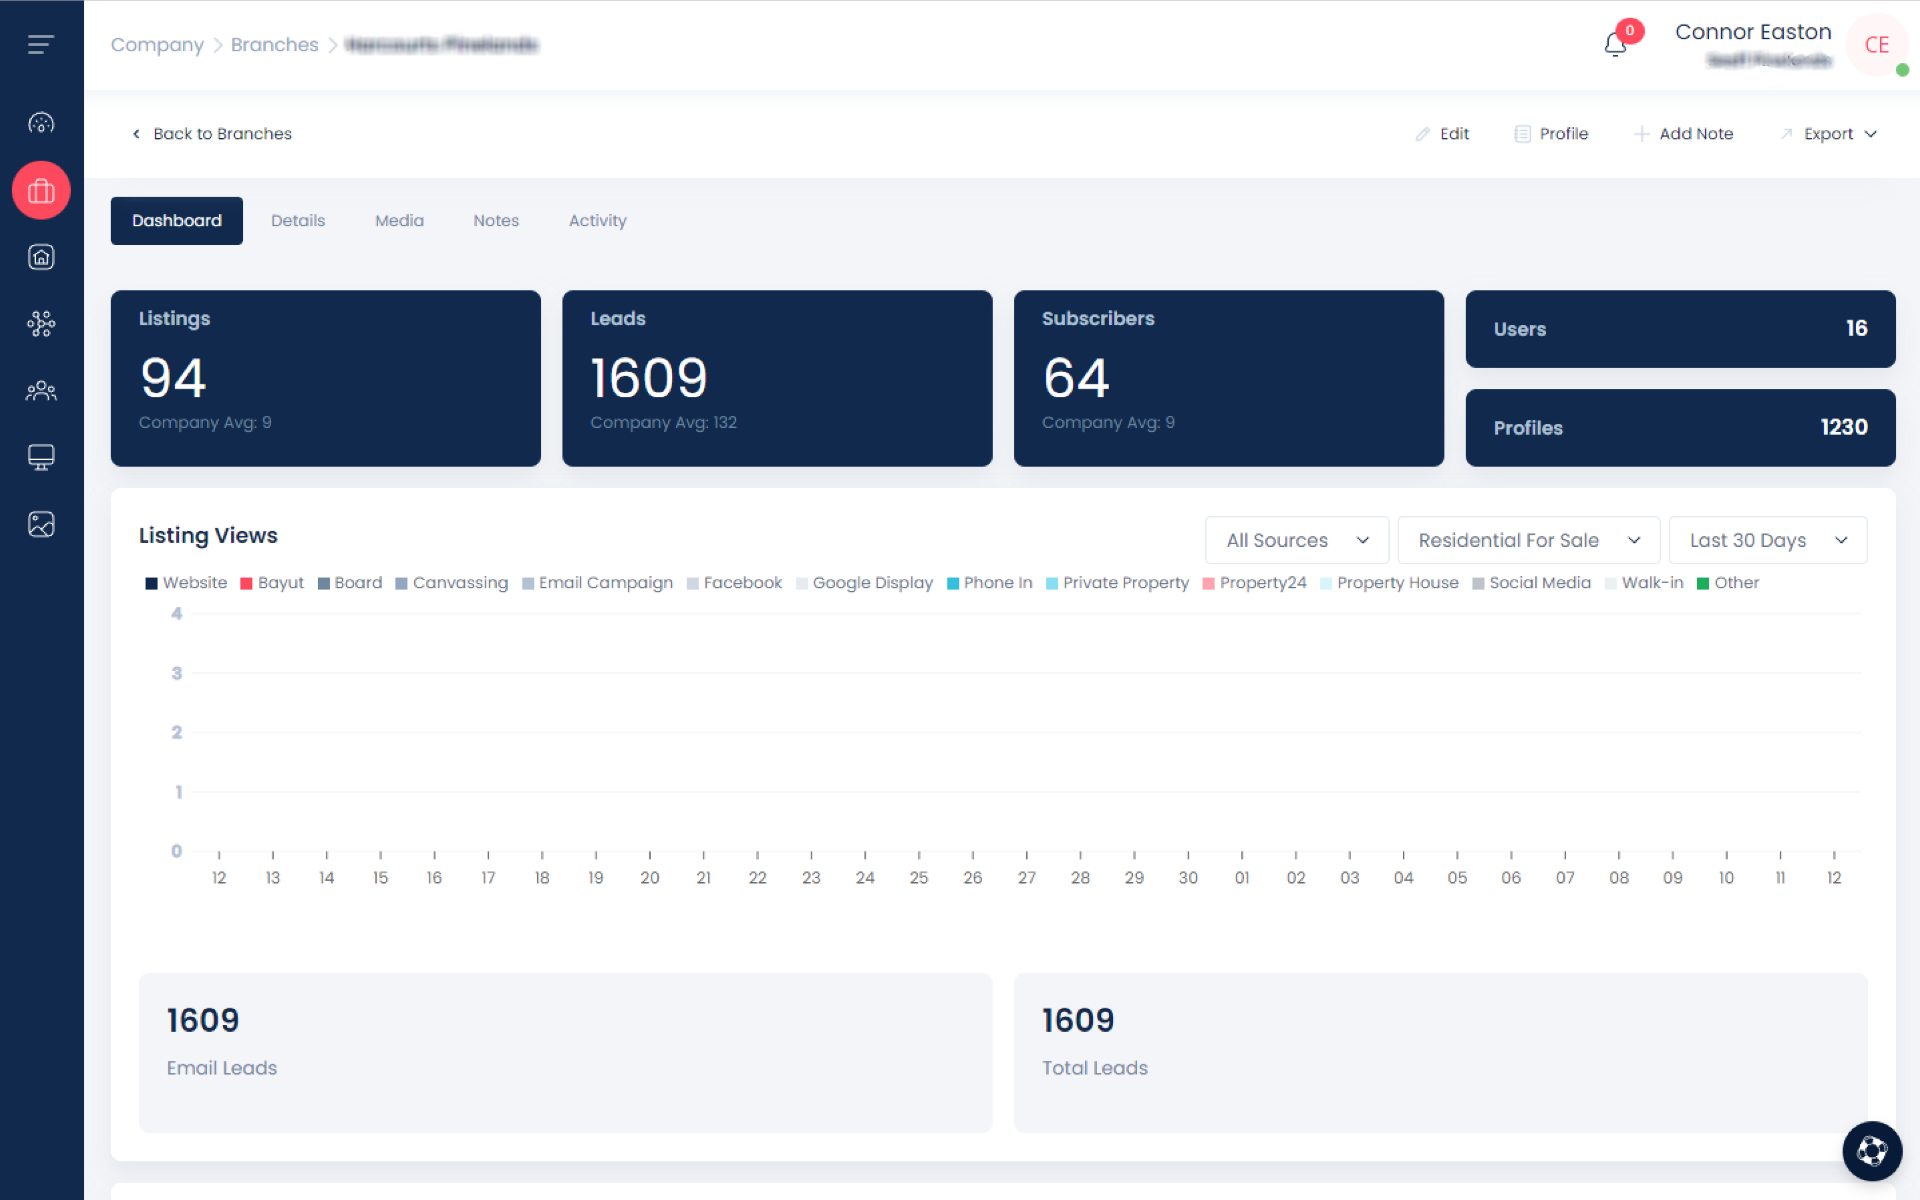
The Branch Dashboard, shown above, shows you the following information:
Listings
This shows how many listings are active within that branch, compared to the company average.
Leads
This block shows how many Leads are active on the system for this branch only, compared to the company average.
Subscribers
This shows the number of clients who have opted in to receive communication from this branch only, compared to the company average.
Users
This is the number of users using the management system that are based in this specific branch.
Profiles
The number of client profiles created by the system for this specific branch.
Listing views
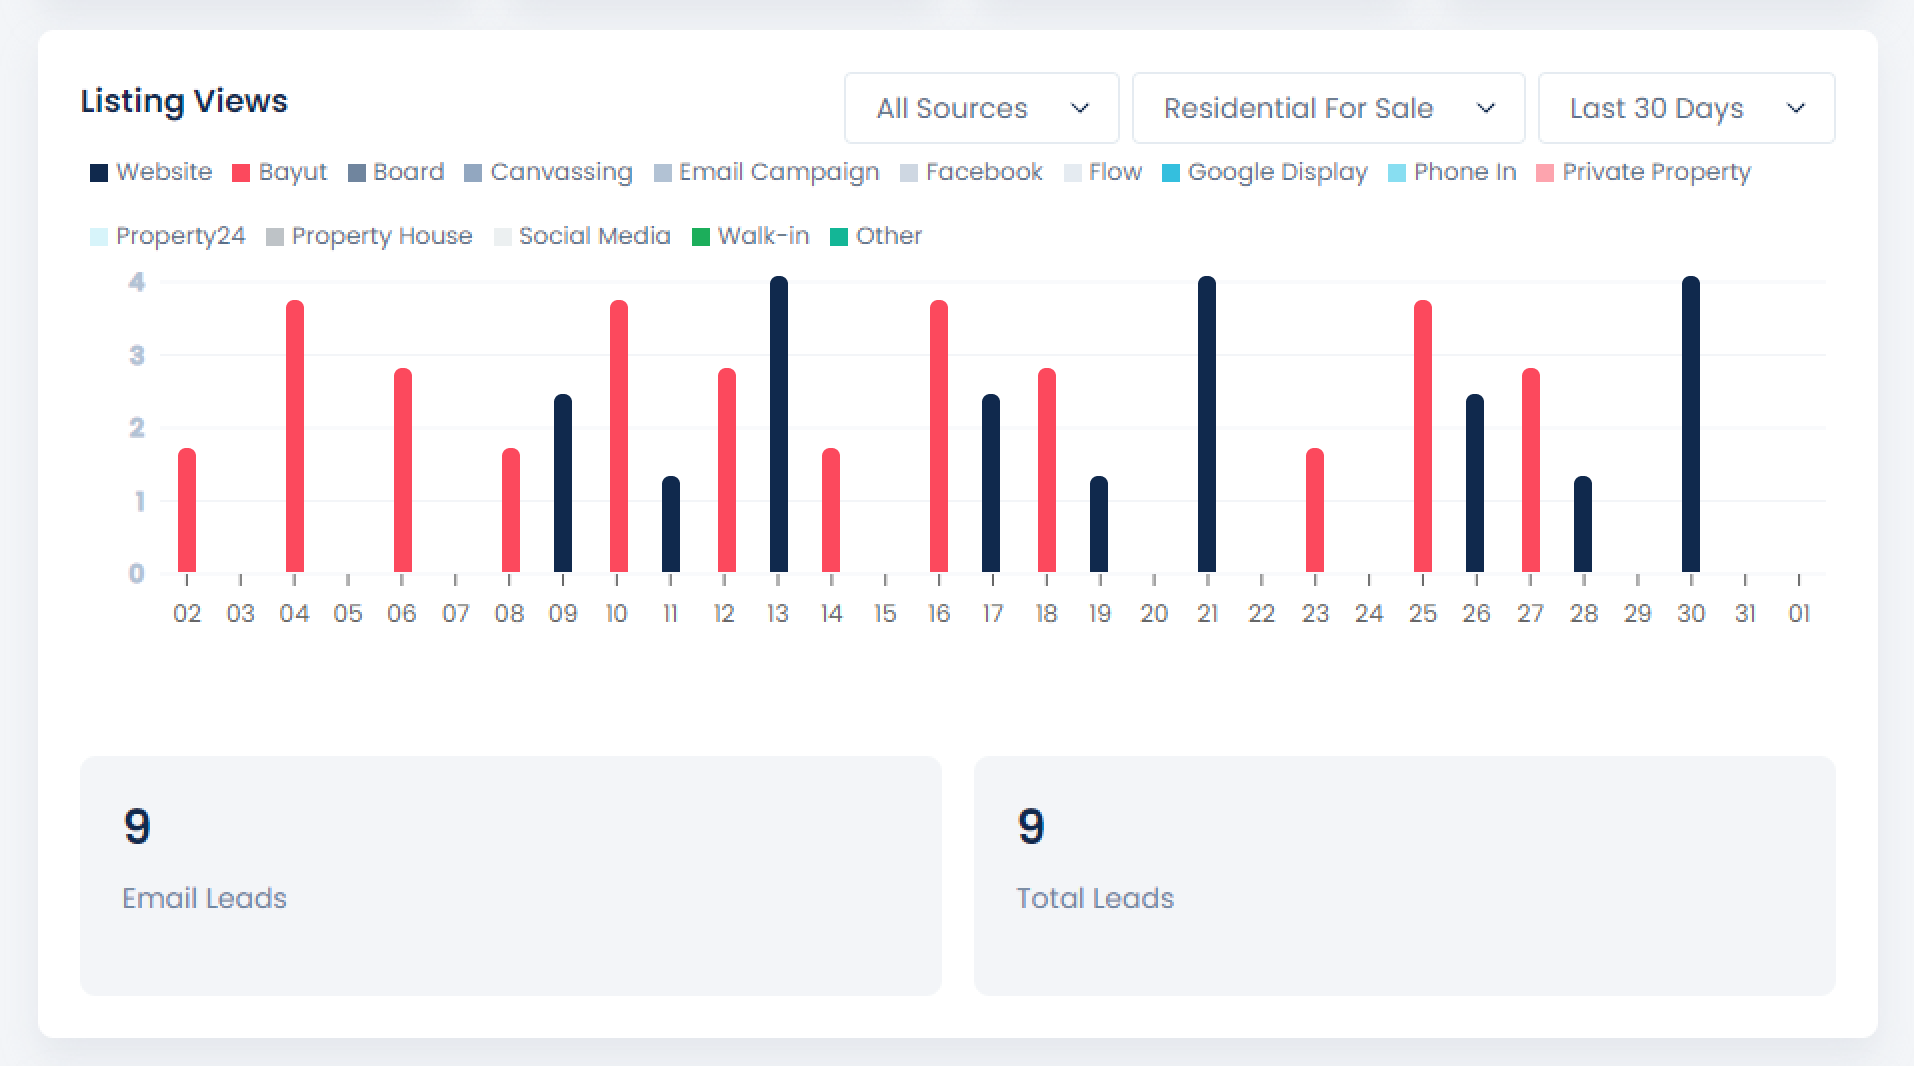
This graph, shown above, shows the number of views for this specific branch and via which portal, website or search engine. This allows you to have a good overall view of where most of your views are coming from. You can also filter this section by source (which portal you want to view listing views from), listing type (residential, commercial etc) and the time period.
Below the Listing Views breakdown, you will see the Leads section showing the total number of leads held by that branch. You will see the Leads that have come in by email compared to the total overall number of leads.
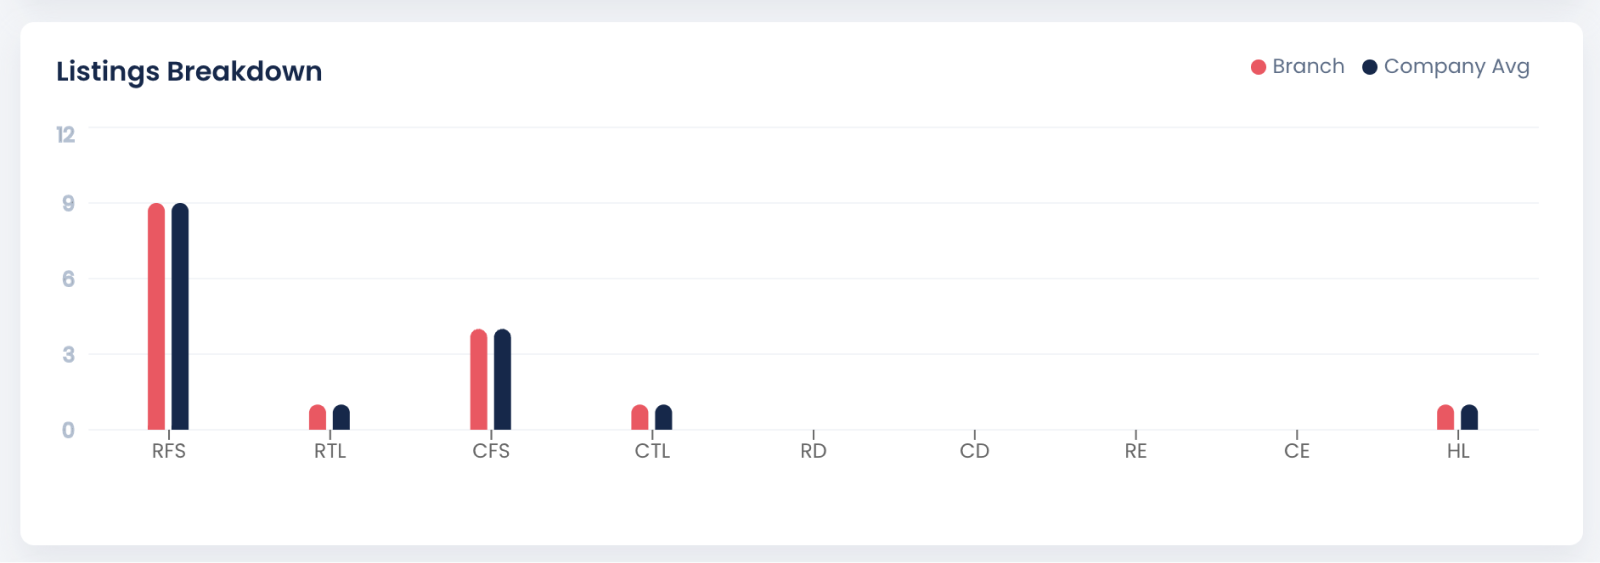
Listings breakdown
This shows the total number of listings held by a specific branch, broken down by listing type i.e Residential for sale, Residential to let etc. This is further divided into listings by branch, vs the company average, which is shown on the graph that looks like this:
Top agents
These are the contact details for the Branch you are viewing and further below that is this section which shows an overview of all Agents within that branch, shown here:
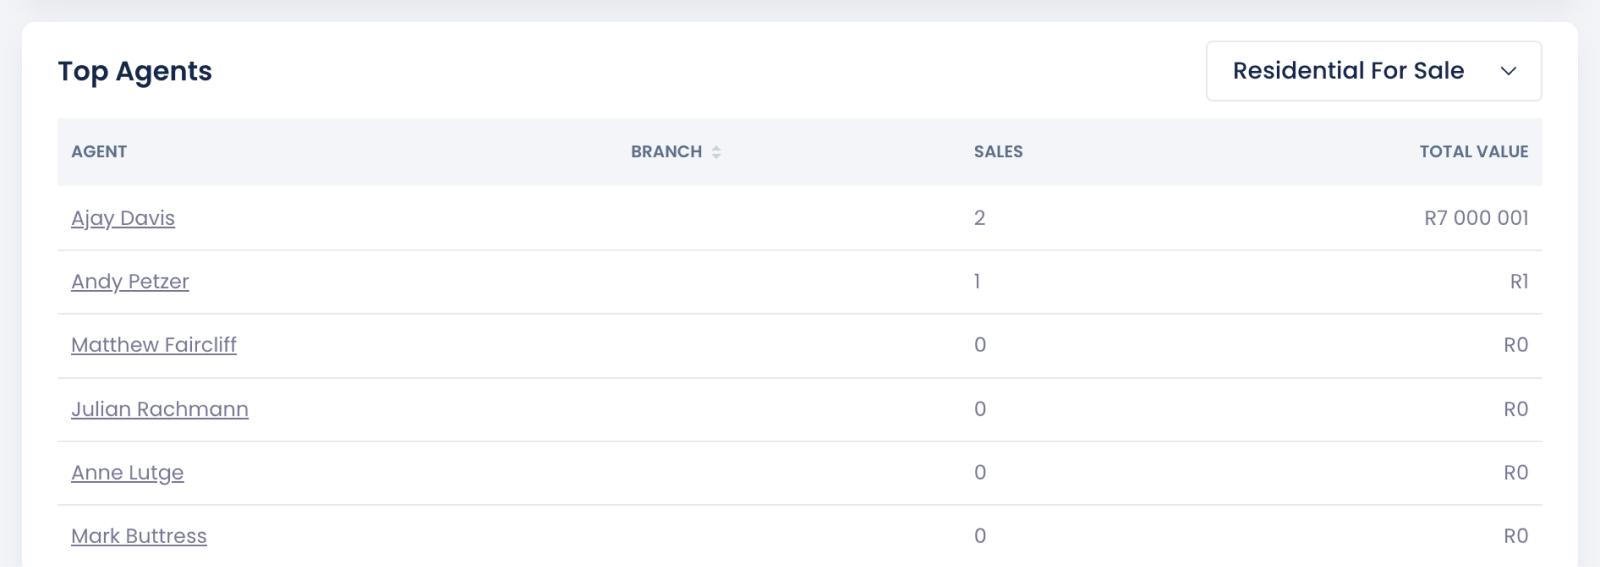
From the top you can see the Branches top agent, with their total sales and total sales value. This can be filtered according to listing type, using the drop-down on the far right corner.
Branch contacts
Below the Listings Breakdown, you will be able to see the contact information for the branch managers as well as the branch itself and where the branch is situated, which is shown by a map location.
Listing age analysis
The Listing Age Analysis, shown below is an overview of all the Agents in a Branch, and the number of listings they have, categorised by the age of those listings. From here we can filter by listing type using the dropdown on the top right of the block.
.png)
Lead and stock
This section of the Dashboard shows an overview of your leads and stock.
.png)
Lead Source - shows where your leads are coming from (portals, website, other) and you can filter this view by Agent, status and time period. This is a great tool to help you understand the main source of your leads which in turn will help you to maximise potential sales.
Lead Status - shows how many of your leads are active, inactive, have not given consent or are non compliant. Genrally, you willl see most leads falling into the non-compliant category since this is the category that the system automatically generates leads from. Until the lead has specified whether they want to receive marketing communication from us, they will be held as non-compliant.
Stock - this block shows an overview of all the branch stock, categorized by archived stock, active stock, pending sales, sold stock and valuations. This can also be filtered according to listing type and agent. This provides a big picture view on the stock status of the entire branch.
Alerts sent - shows how many alerts and the type of alert that has been sent from a specific branch. The types of alerts are split into manual alerts (alerts sent manaually by an agent to a buyer or tenant match), new listing alerts (sent by the system to the buyer/tenant matches that are created by the system ), price reduced alerts which are sent to buyers/tenants who have opted in to receive price reduction alerts on a specific listing and on show alerts which are sent to buyer/tenant matches who have shown interest in a specific property.
On the current dashboard, you will also see a list of options, shown below, appearing at the top left of your screen. The blue highlight shows what section you are currently on i.e Dashboard. You can also navigate further from here onto Details, Media, Notes and Activity. Let's go through each of them:
.png)
Branch Record Tabs
Dashboard - The Dashboard tab shows the branch dashboard, which we have discussed above.
Details - clicking on Details will take you to a page where you can view all the details on this specific branch which will include contact details, locations in which this branch services, branch social media URL's and which portals this branch feeds to.
Media - this is a great area of the system to place any branch documents that are relevant to employees. This could be HR documents, company policy documents, company/employee photos etc. If you find that you do not have access to the documents in this section, this is because you do not have the User permissions, which is determined by the admin.
Notes - this section can be used to add any notes relevant to the branch. There is also a search function in this section to use if you wish to locate a specific Note.
Activity - This section is a log of all User activity. It provides a record of all changes and updates made, when they were made and by whom.
Profile
This is a handy feature whereby you may download a 2 page PDF profile of the branch. On the PDF you will see all the Branch contact information, total number of listings, subscribers, users and leads, top agents, franchise information and location information. Here is what your download will look like:
.png)
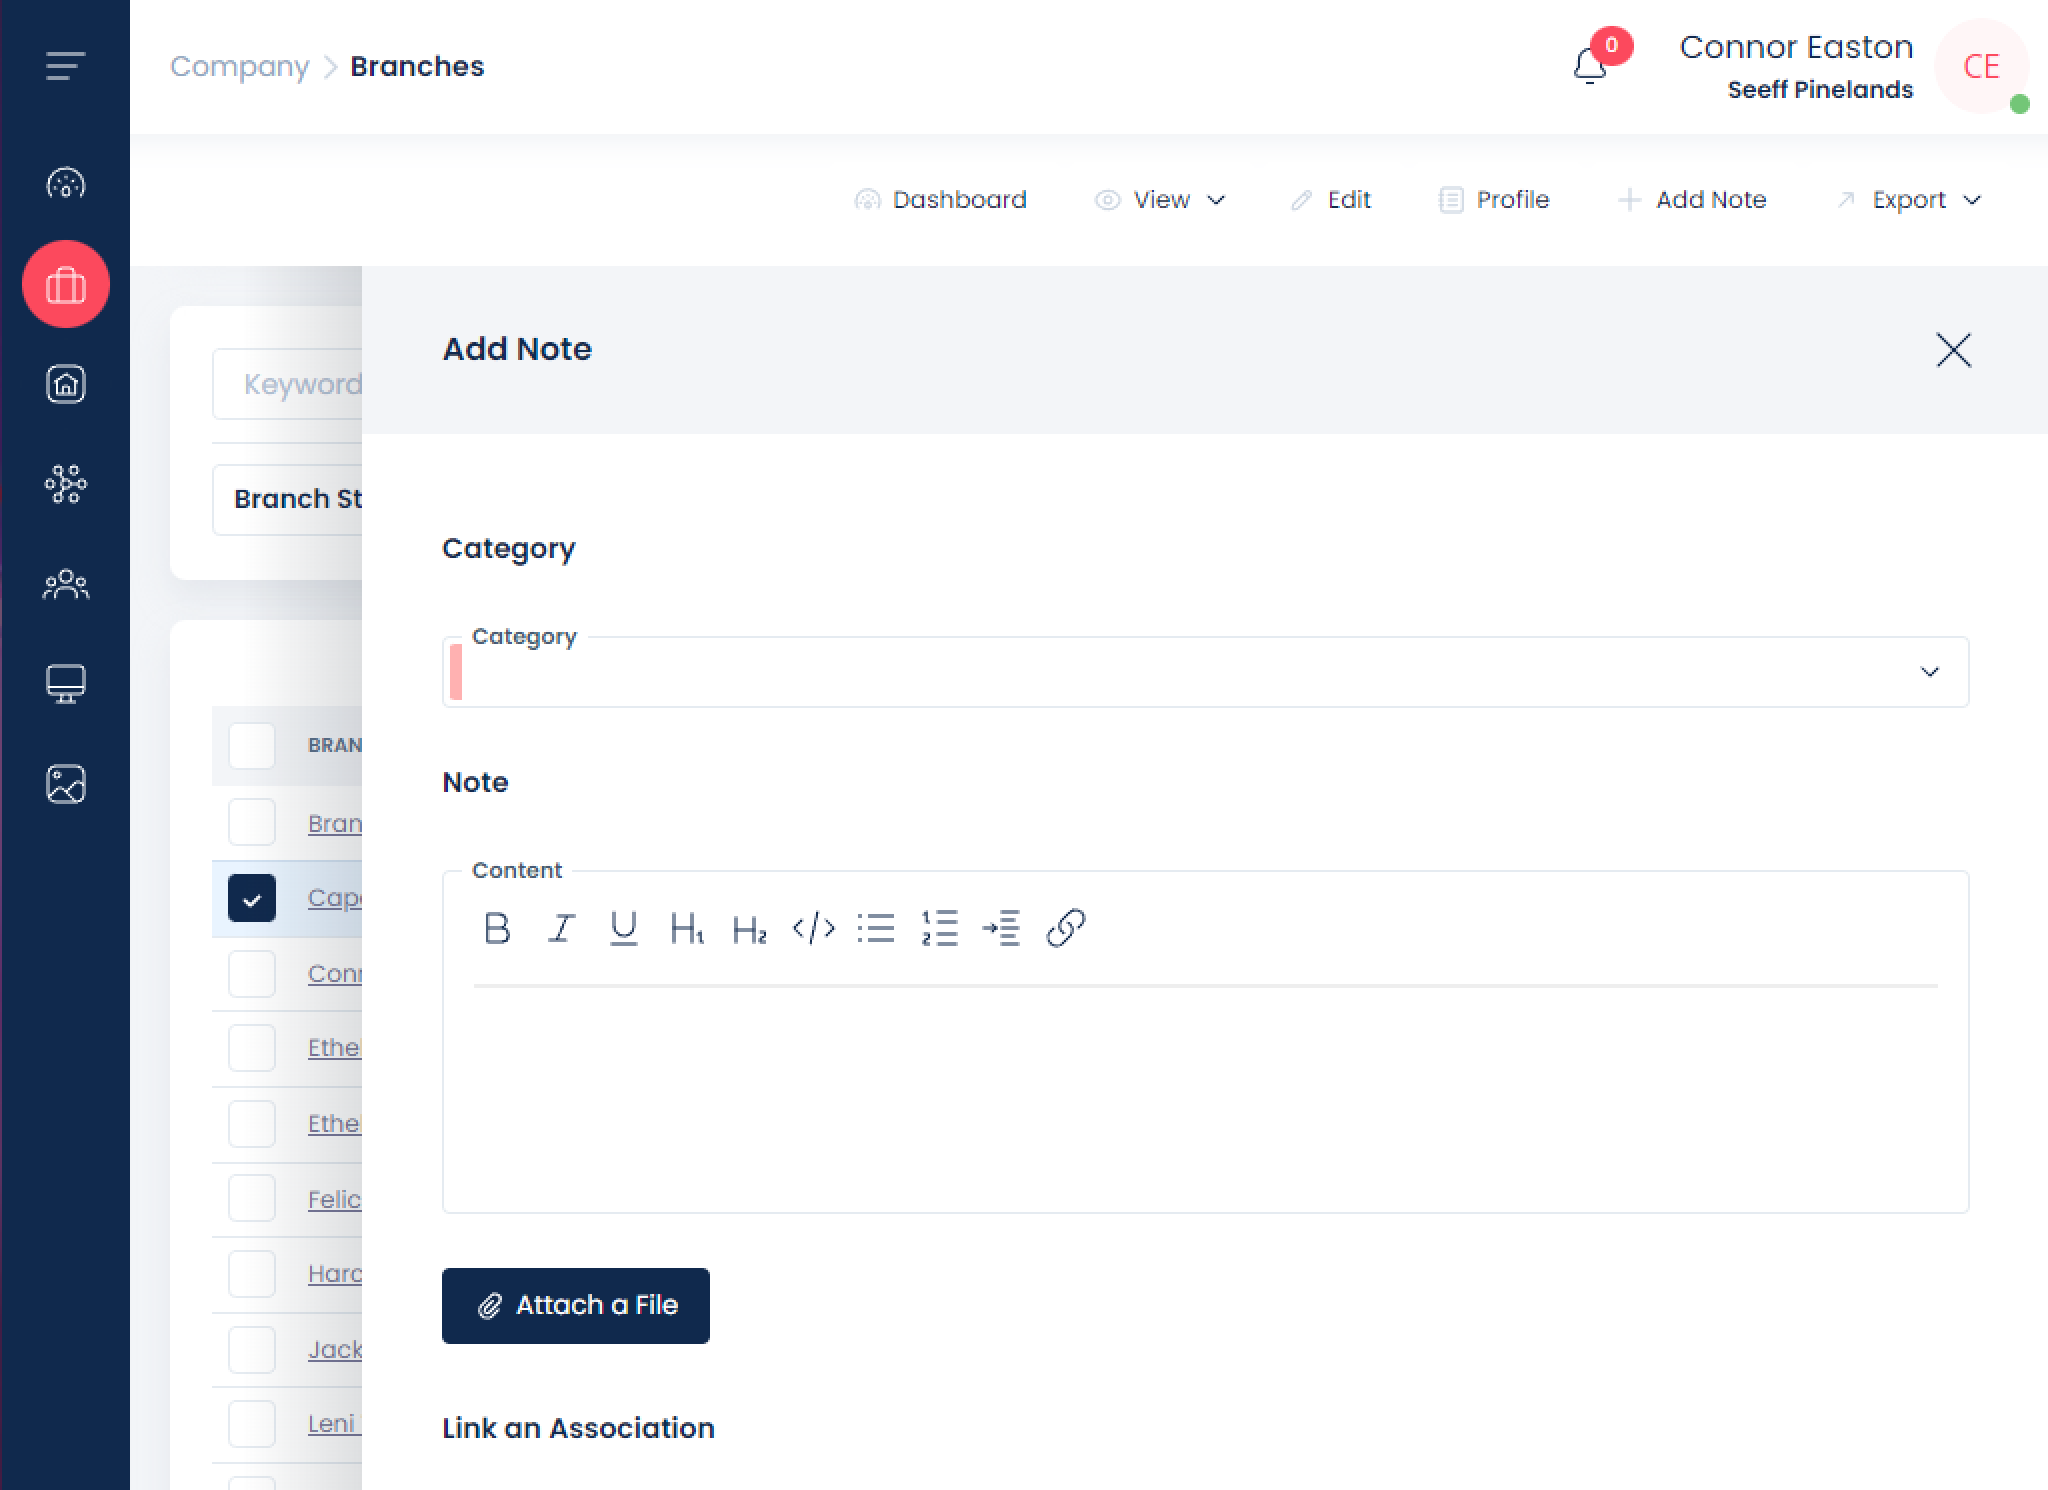
Add Note
Using the Add Note function allows you to add a note relating to the specific branch you've selected. When you click this button, a form will appear - see below example. You will be able to write your note and categorise it. You can also associate a specific agent or contact to that note by clicking on Link an Association. You can also attach a file to the note you are adding by clicking on the attachment link.
Copyright © 2023 Prop Data (Pty) Ltd Privacy Policy