

General Functions
Get to know some of the features that are common across the majority of modules. These include functions such as reporting, column management and brochures.
Summary Pages
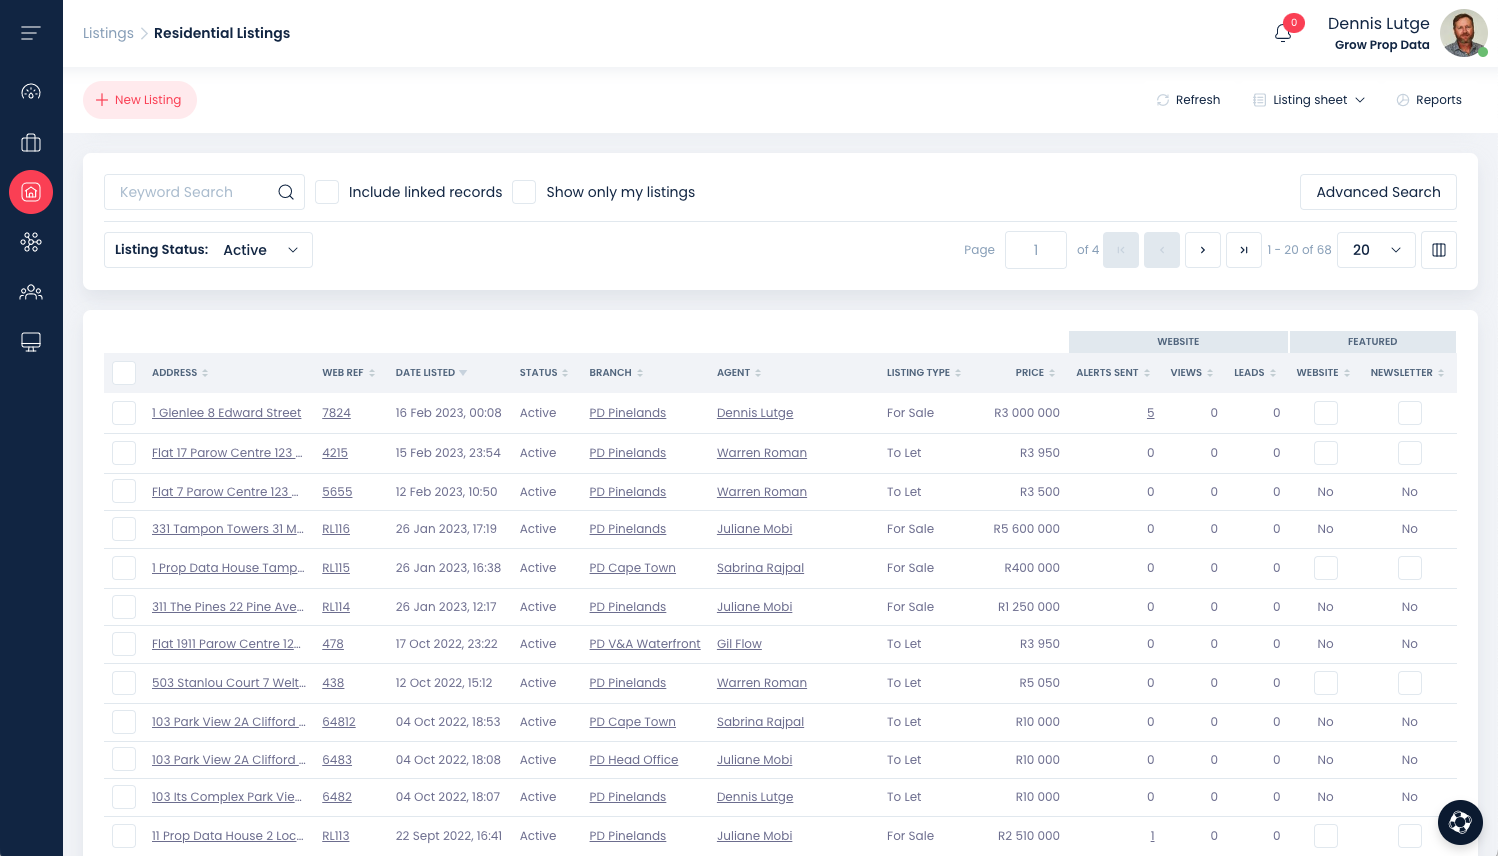
The summary page is displayed when you select a module within the system i.e. Residential Listings, Leads and so on. The summary page will have the default status of Active (listings, profiles, leads, etc.) and the columns shown will be those of the default setting. To manipulate the columns shown on your summary page, please see the column management section below.
Column Management
The column management tool appears on every summary page in every module of the system. The summary page comprises your active residential listings, leads and so on, but with the default columns displaying. For example, if you click on Residential Listings, it will open onto the Residential Listings summary page which shows you an overview of all your active listings. Active is the default status on the summary page. The same goes for other listing types as well as the Clients and Company modules. Change the Status by clicking on the relevant Status dropdown menu.
The column management tool enables you to change the columns and the order of the columns on your summary page. From there, you are able to export and download an XLS of your summary page with the exact information you need.
Note: Various functions such as reporting and exporting are dependent on your access level.
The column management tool icon appears to the right of your summary page (note the highlighted block below):

When you click on the Manage Columns icon, the manage columns menu will appear:
On the Manage Columns menu, you will see how your columns are currently laid out, top to bottom and the order in which they reflect on the summary page (left to right). You can change the order of the columns by clicking and holding the double lines and dragging the particular field into the position you would like it to be. You can also delete any columns you don't wish to be visible on the dashboard summary by clicking the x button next to the field name.
How to add a new column
You can add a new field to your view by first clicking on the Add a Column drop-down arrow and then selecting the field you wish to add into your view. You can also type the required field name into the block and the system will then make suggestions of which field you wish to add. The fields that you can choose from are only the fields that exist within the add/edit form.

For example, you can add the following Property24 (P24) fields to your view so that you can monitor your listings' performance on the portal at a glance, as seen in the example below:

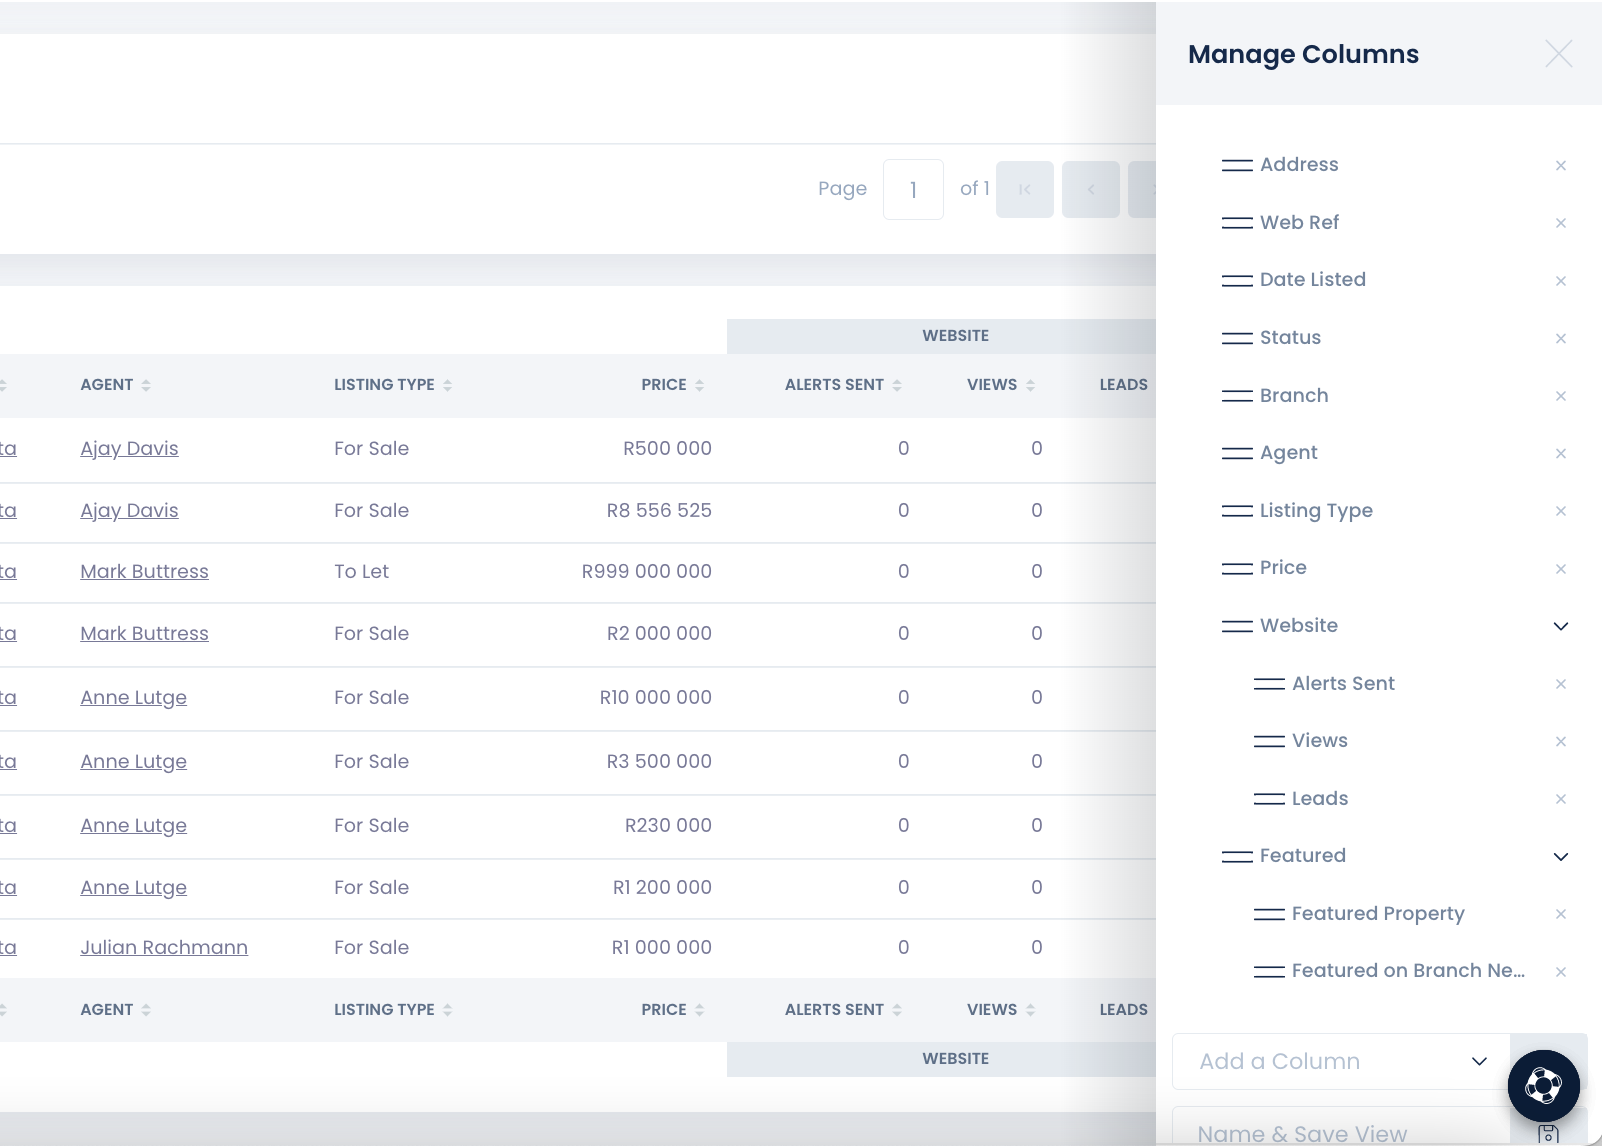
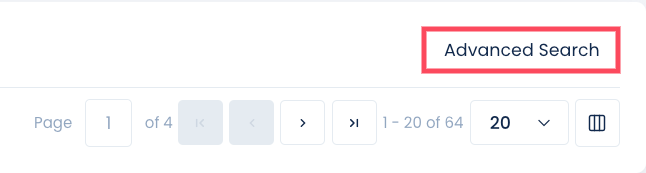
To save the particular view you have selected, specify a unique descriptive name of the view you have created and save that view by clicking on the Save icon, highlighted in the image below.
You will then be able to jump between your saved views to get additional information. For example, you could have a saved view for P24 with the columns listed above or you could have a seller/landlord view, a beds/baths view, etc. The options are limitless.
Note: Saved views are user specific.
Please see the video below for a demonstration on how to add new columns.
Advanced Search Function
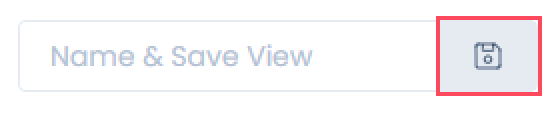
The next feature covered is the Advanced Search Function, which is visible on the majority of summary pages. The Advanced Search Function is now much more refined than the search function on the previous system and allows for more targeted search results. The Advanced Search will always appear at the top right of the summary page.
When you click on Advanced Search, a form will pop up that looks like this (residential Advanced Search shown below):
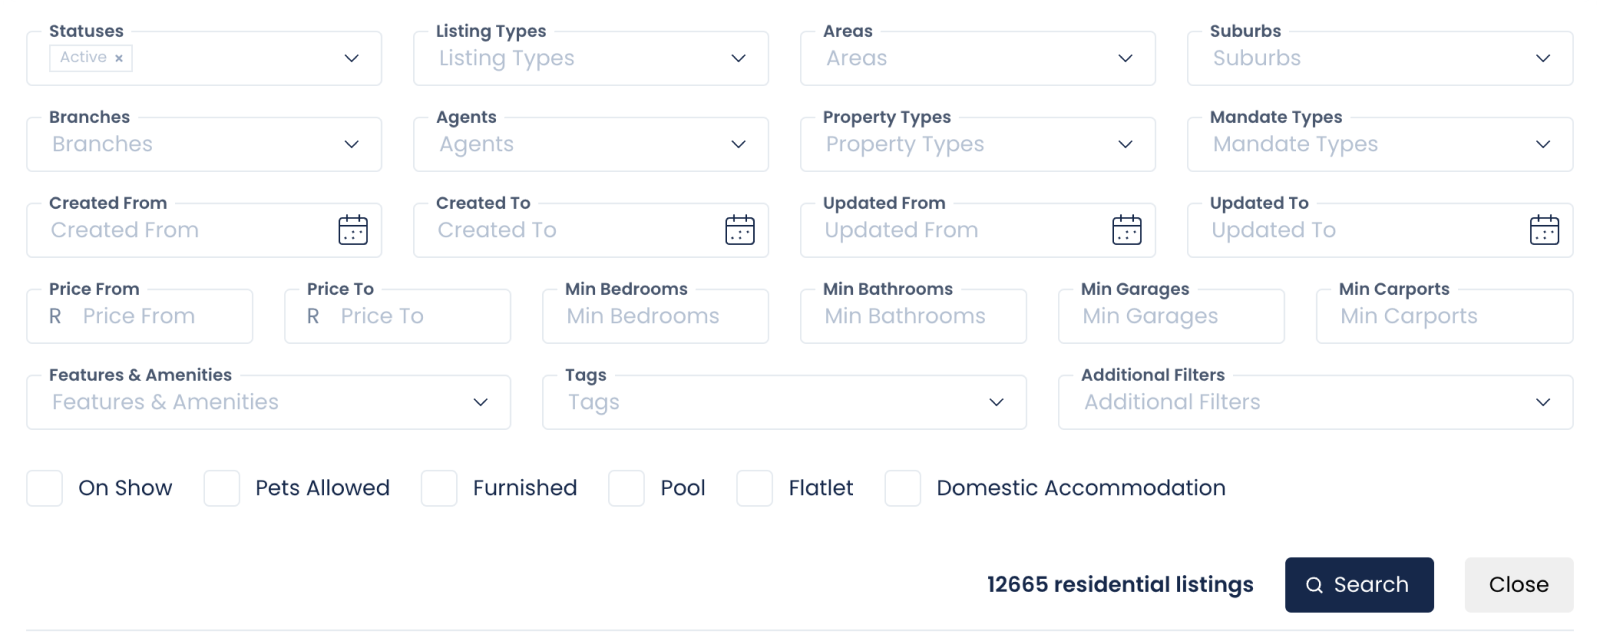
The Advanced Search is useful to find listings, for example, in a particular suburb that are a House, which are sole mandates, with 3 bedrooms, and created within the last month. Another handy feature of the Advanced Search is that you are able to find your listings where you added specific Features and Amenities to when adding or editing a listing. You are also able to search by Tags that have been added to listings.
Use the checkboxes at the bottom of the Advanced Search to find your listings that are On Show, for example, or to find your listings that are Furnished.
Once you have selected the various criteria for your Advanced Search, click on Search, the system will now display the relevant listings.
You can also use the Advanced Search to find certain listings (within your criteria) that you wish to report on. So once you have the correct data on your screen you can now click Reports or Export.
Note: Certain field inputs in the Advanced Search, for example, Status, Listing Type and Property Type, are multiple select fields. If you leave a field blank, the system will assume that you want all fields pertinent to that option to be displayed. i.e. all data as opposed to a single status, for example.
Tags
Tags are useful in the case where a field does not exist within the system already. Depending on your access level (User Group), you may be able to adds tags or you will be presented with a list of tags that have already been added by your management team. It is not necessary or efficient to add a tag for a field that exists within the listing, lead, contact etc. add/edit forms, adding a tag for suburb or adding the listing street address as a tag is counter-productive as you can search for those fields with the Keyword Search and Advanced Search.
Useful tag additions could be: 10 000L JoJo tank, Airbnb ready, Off-the-Grid Solar or 10Ha irrigation dam, Cash Buyer, Cash and Bond, etc.

If a tag/s has been added to a listing, you will be able to use the Advance Search function and find the tagged listing/s or use the Tags column on the summary page (Column Management) to find your tagged listings.
How to Add a Tag?
While in any applicable add/edit form; listings, leads and so on, or if you have access to the Site Settings of your Manage platform you will be allowed to add or allocate a tag to that record. See example from a listing edit form below:
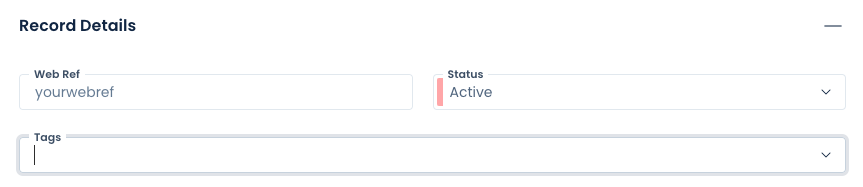
Let's go through the various ways you can add a tag and then make use of an added tag below:
Adding a Tag using the Site Settings (Access Dependant)
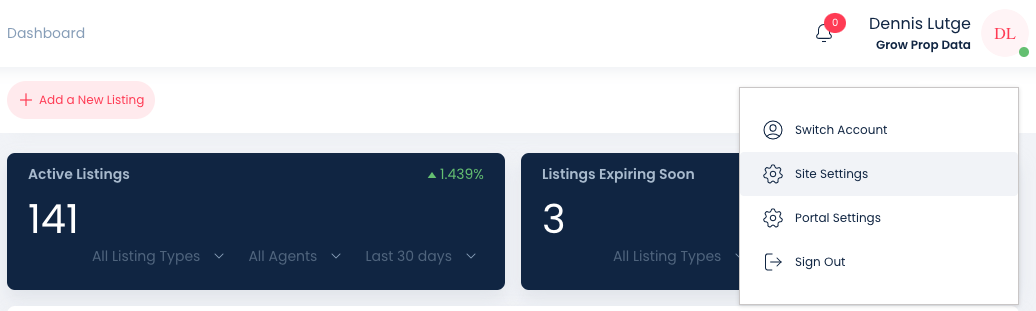
Click on your profile photo or initials at the top right of screen, then select Site Settings.
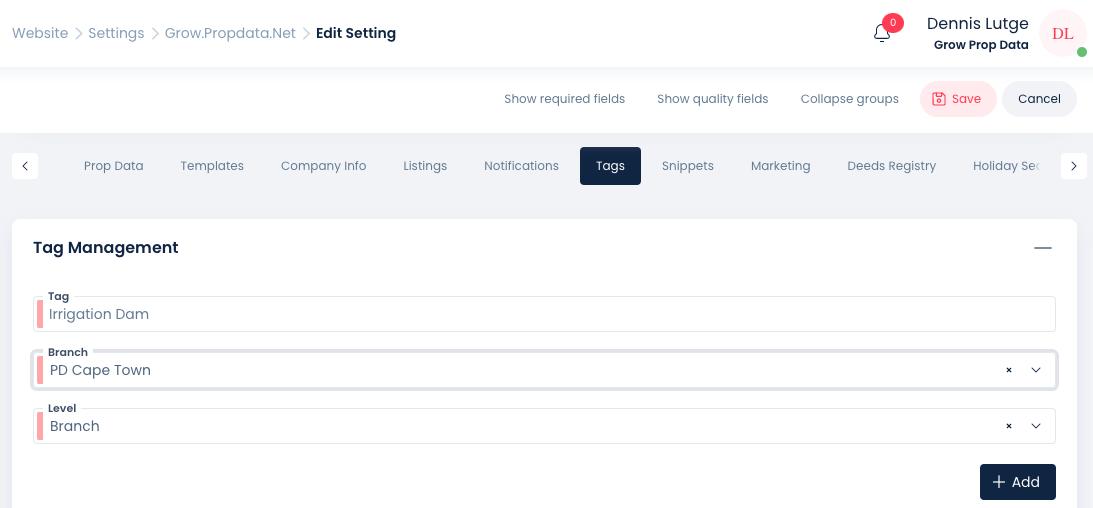
Click onTags . You will be presented with 2 required fields discussed below:
Tag: Enter the name of the new Tag you wish to create.
Level: Who should have access to use this Tag?
- User: This will add the Tag to your user profile only.
- Branch: All users within the specified Branch will have access to the Tag, you will be presented with a dropdown of all active branches, should you select this option.
- Agency: All users within the company regardless of branch will have access to use the Tag.
See screenshot below of the various options and page layout: We have added a new Tag called Irrigation Dam with an Agency access level.

If you are happy with the spelling of your new Tag, click on the Save button to the right of screen:
How to Edit or Delete a Tag (Site Settings)
If you would like to edit an existing Tag, from the Site Settings, click on the Tag menu. Find the Tag you would like to edit/delete by scrolling down the page or by using the Keyword Search.

Once you have located the specific Tag, Click on the Pen icon and you will be presented with a tray menu from the right of screen. Complete the required fields and click on Save, as can be seen in the image below:

To delete an existing Tag, click on the Bin icon, the system will prompt you to type in a value or the word DELETE as seen in the below image, the Confirm button will not be available to be clicked until the required value has been added into the text field. In the example below we are required to type in the word DELETE.

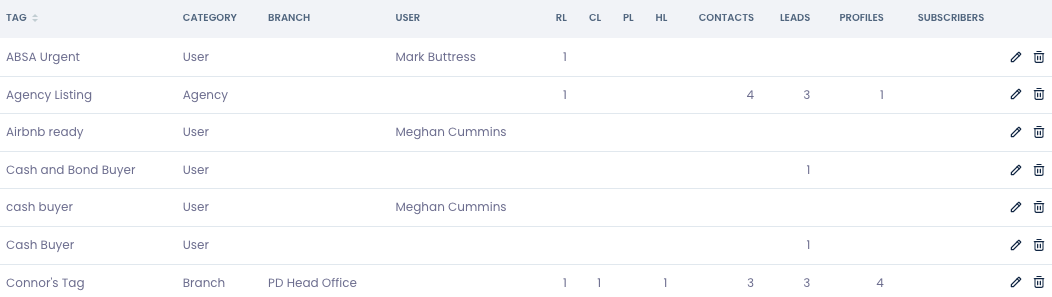
The Tags summary page will indicate the number of times the Tag has been used and in which module. Ideally you would not want to delete a Tag that is widely used across your Manage application. In the screenshot below you can see the Tag (name), the Category, Branch, User and the various a modules the Tag is being used in. For example RL - Residential Listings, CL - Commercial Listings, Contacts, Leads and so on.
How to Add a Tag While Adding/Editing Records
As mentioned in the introduction to this section, Tags can be added and allocated to listings, leads, contacts and the like, wherever you see the Tag field, you will be able to add a new Tag (access dependant) and make use of Tags. Take a look at the short video below to familiarise yourself with the process.
Using the Advanced Search to Find Your Tagged Records
Once a Tag has been added to a listing, lead, contact etc. use the Advanced Search to find your tagged records quickly and efficiently.
Real-world Scenario; A client has called and wants a house with an existing solar installation, previously you created a Tag called Solar Power and have been allocating this tag to your listings, you would now like to find your listings with the Solar Power Tag. You can also use the same Tag to note which of your buyers are looking for a property with solar. Watch the video below to see how quickly you are able to find listings using the Advanced Search and Tags.
Snippets
What is a snippet?
Snippets are predefined, reusable text 'blocks' or paragraphs of text that can be used in the listing description and valuation reports for any text that you are going to be adding to a listing or valuations report regularly. For example, if your company has a disclaimer added to every listing, this can be added as a Snippet which can then be added to the bottom of the description. Or if you would like to use a snippet to populate the Intro and Your Agent sections on the valuations report a snippet will do the job.
How to create a new snippet
To create a Snippet, click on your Profile Photo/Initials at the top right, to access your site settings (Access Dependant).
Then, click on Snippets.
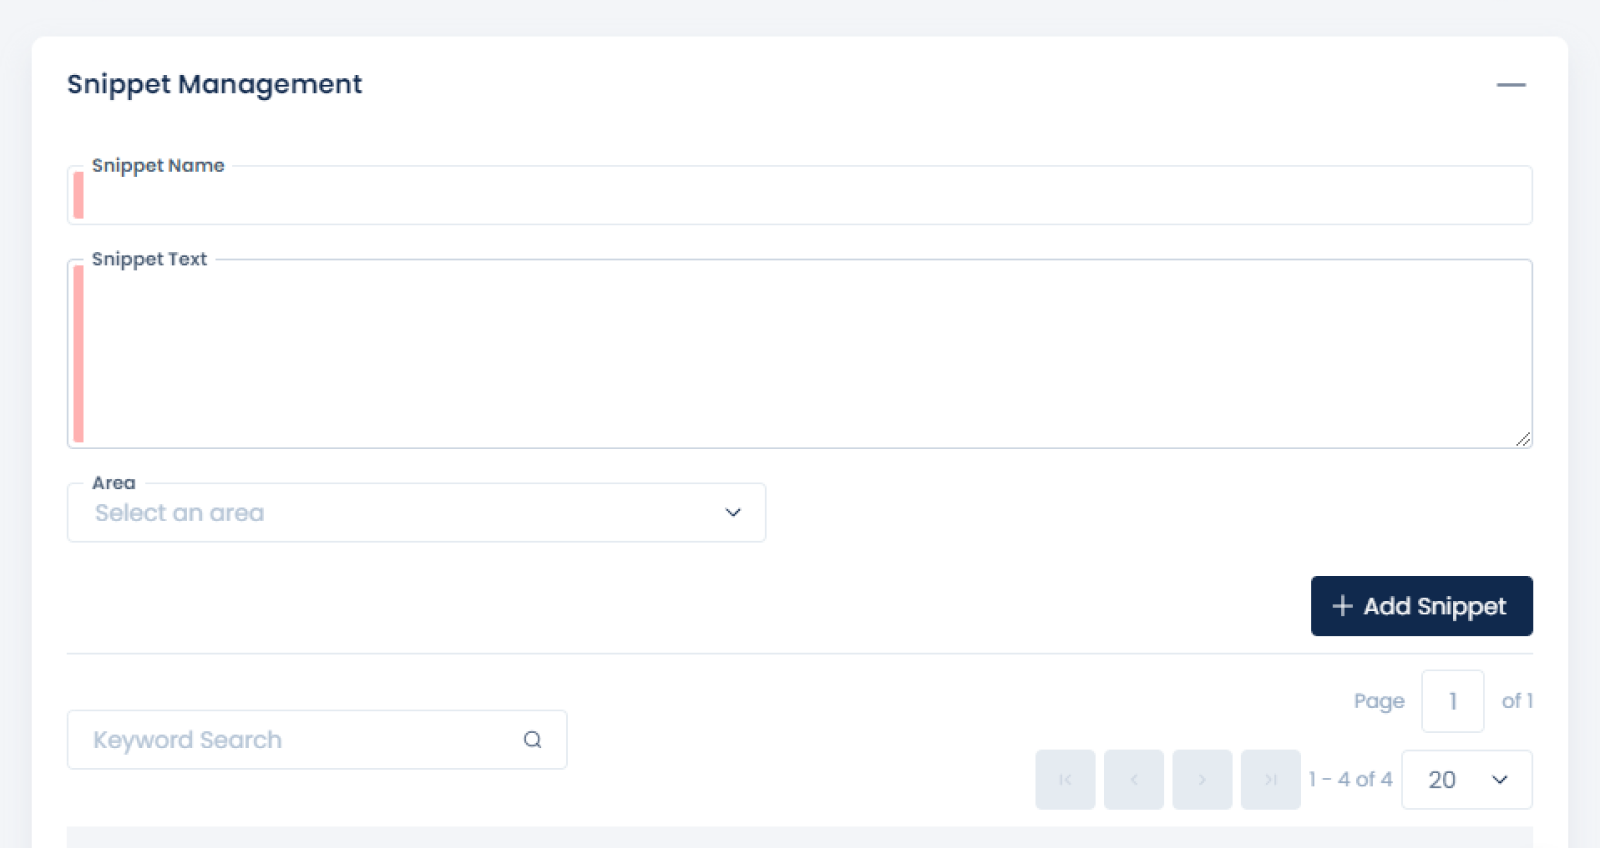
Give your Snippet a unique name and add your Snippet into the Snippet Text Field, as seen in the screenshot below. Once done, click on Add Snippet.
Adding an Area and Suburb is not required. Doing this will only make that Snippet available if you have selected that Area/Suburb when adding/editing your listing.
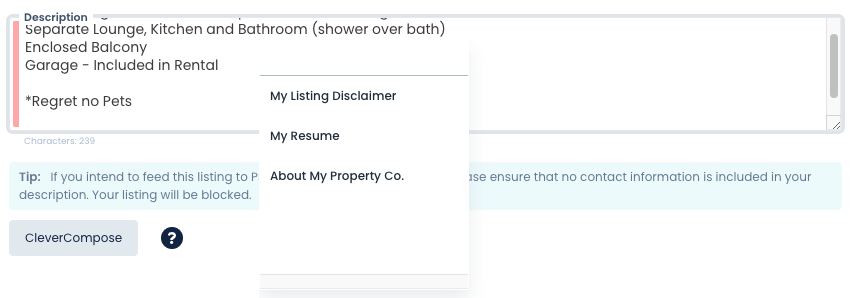
To use the Snippet in your listing Description, go to the position you wish to add the Snippet, press Ctrl + Space on your keyboard and select the Snippet you wish to use, as seen in the screenshot below.
Access to add Snippets is User Group dependent.
Adding Notes/Actions
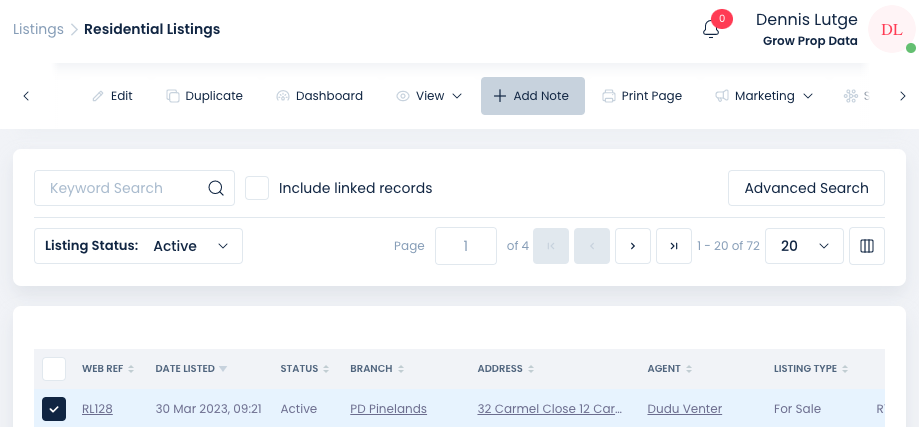
A Notes/Actions button can be found on every Dashboard page of every module and on the various Details pages across the system and appears as shown below. This is a common feature that allows you to add notes on a specific listing, client profile, contact and so on.
How to Add a Note
While you are navigating through the Details of a branch, listing, lead, contact, etc. you will see the button + Add Note at the top of the screen. Clicking this button will take you into the Notes editor for that specific record. See the image below:
When clicking on the + Add Note button, a slide-in menu will appear from the right of the screen. In the screenshot below, we are adding a note to a listing to record an OTP that has been received.
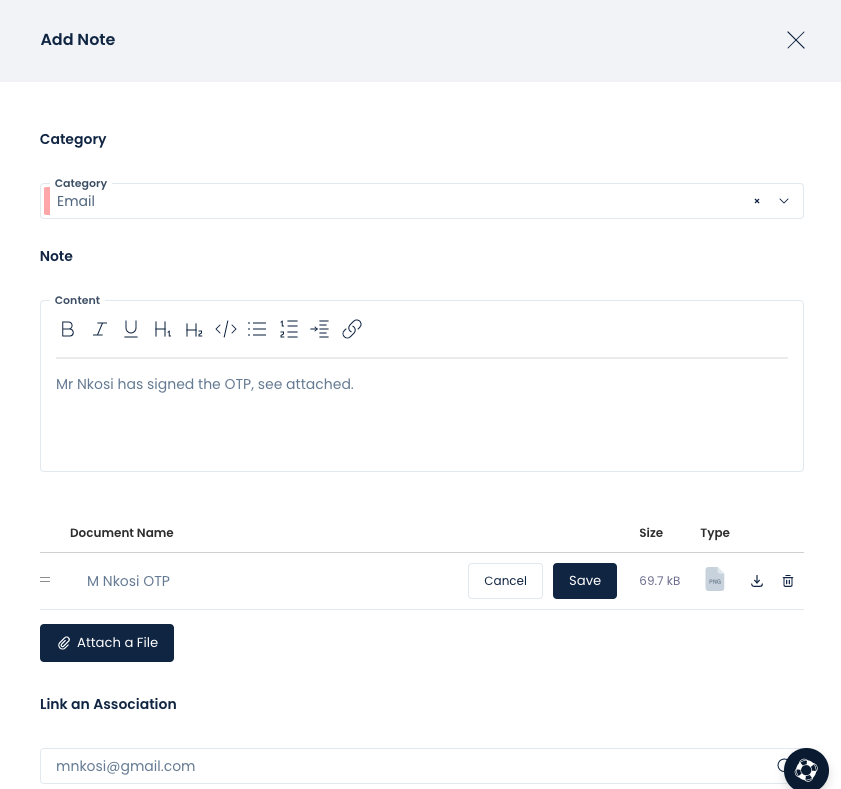
Category: Specify the type of note or the source that the note was received from.
Content: This is the body of the note. Here you will add text explaining the note and/or attachments. You are able to use formatting such as bold, italics, headings (H1, H2), insert code </>, add bullet points or hyperlink a field.
Attach a File: Click this button if you have a document to associate with the note. In the example above, we are creating a note for an OTP received on a listing from Mr Nkosi. Once the file has been uploaded, you are able to edit the file name by clicking on the pen icon. Once renamed, click on the Save button.
Link an Association: With this field, you can associate a contact or another agent to your note. In the case above, we are linking the OTP to Mr Nkosi by searching for his email address. Select the correct contact by clicking the + button to the right of their details.
Additional Functions: To rename your uploaded attachment, click on the Pen icon and specify the new file name, to delete an attachment click on the Dustbin icon. To download an attached file, click on the Down-arrow, a new widow will open and allow you to view/download your attachment.
How to Edit Notes
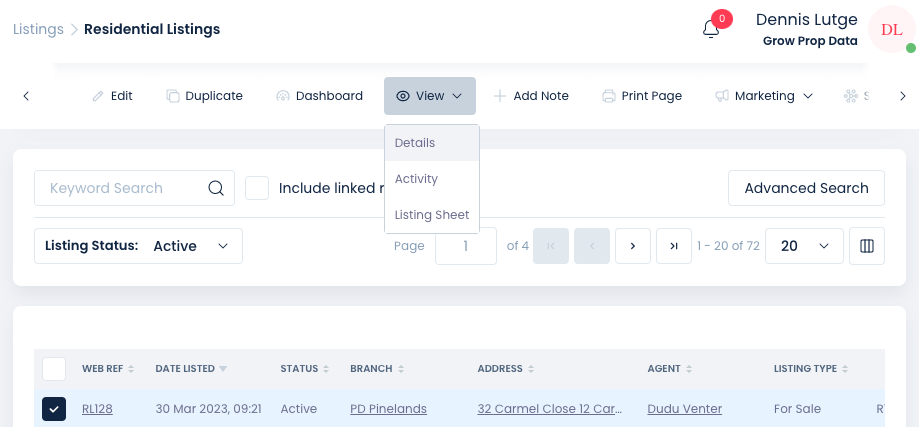
If you have made a typo or would like to add or remove information and attachments from an existing Note, select the record that has the note or notes you wish to edit. Then click on View > Details. Note that you can select more than one record and follow the same procedure.
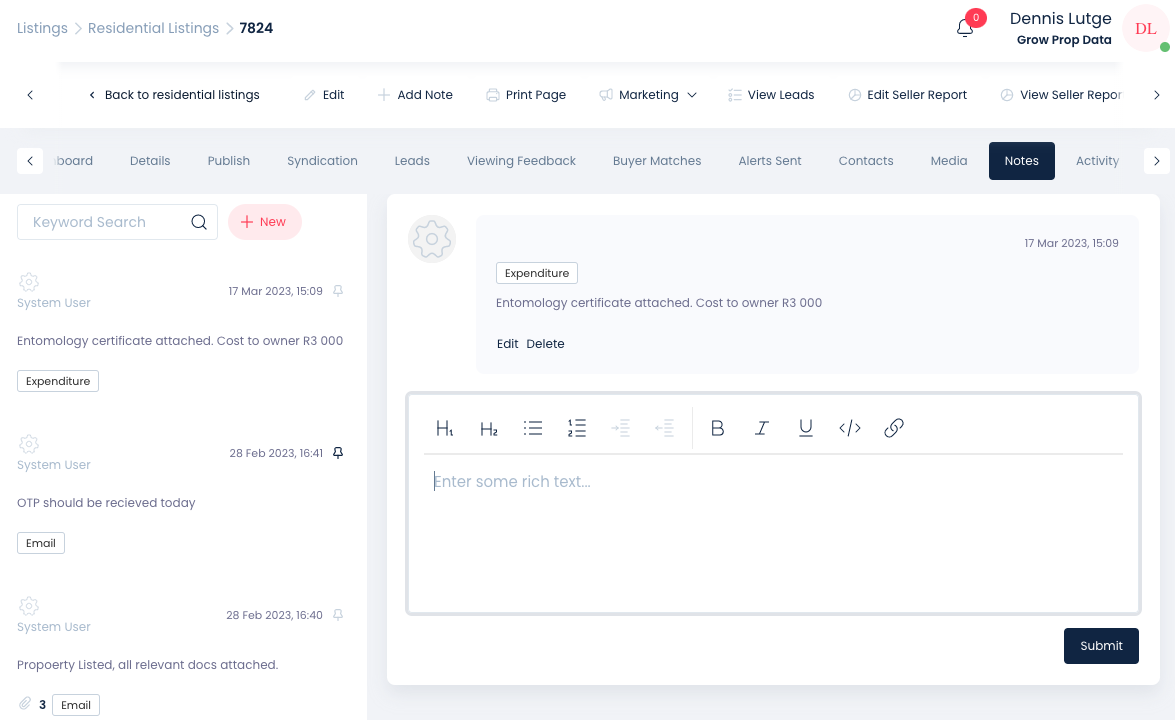
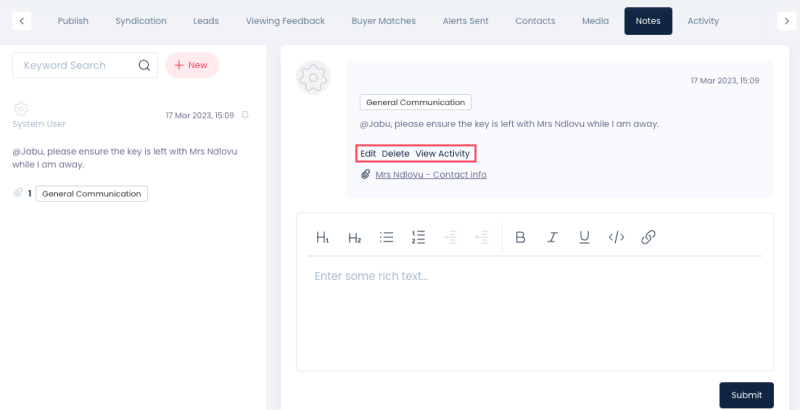
Now click on the Notes button, the Notes that have already been added to the system will be displayed to the left of your screen with the creator of the Note, the text associated to the note and the number of attachments on the note (Paperclip Icon).
To edit the existing Note, click on the Edit text, highlighted in the image below, you can also Delete the note or View Activity of the Note. The rich text block will allow you to append a new Note to an existing Note, thereby creating a Notes thread.
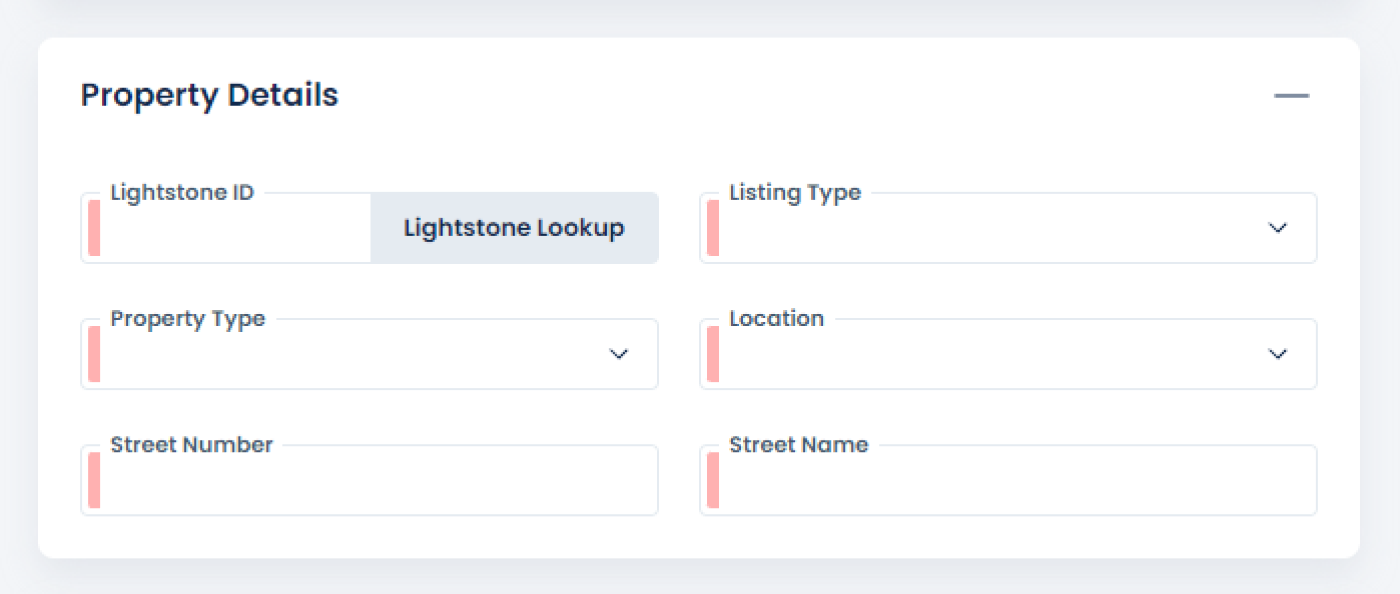
Required Fields
Certain fields are required by the system to create a new record, whether it be a listing, contact, user or branch. This is the most basic and important information on the record. A record will not save unless ALL the required fields have been completed. The system will alert you to the name of the required field/s that have not been completed. All required fields are indicated by a coral-coloured bar as shown in the image below.
Reports Function
Each module has its own reporting functionality. Please see the relevant section for specifics on those reports.
We have changed our reoporting interface, read more HERE.
Export Function
The export function is a general function across most modules. The data you receive on your export (in most cases) is dependent on three factors. Firstly, the current status of listings, agents, etc. that you have selected and secondly the data that you currently have on your screen. That is, the number of records to display and the columns you have added to your view and lastly, if you have requested specific data via an Advanced Search.
Set up your columns and the number of records you wish to display on your screen prior to requesting your export. See how to manage your columns here.
To change the status on the listings, agents or branches summary page, select the Status dropdown:

To change the number of records displaying on your screen, use the number dropdown:
.png)
NOTE: The export function is dependent on your user group access.
Now that you have setup your page view, there are 4 options provided when clicking on Export. These are detailed below:
Current Page (PDF) — This option will provide you with a one-liner style PDF report, the column headings will be those of the default column view. The export will only have the number of records of the selected status or search, currently on your screen view.
Current Page (XLS) — The Current Page (XLS) export will export the columns you have selected to be added to your view. The export will only have the number of records of the selected status currently on your screen view.
All Records (XLS) - The All Records XLS will provide you with an export of all the records for the current status or search, with only the columns (default or selected) on your screen view.
All Data (XLS) — The All Data XLS will provide you with an export of all the records, with all fields in all statuses. For example, all residential stock.
Tip: You can sort the data on your screen from lowest to highest and highest to lowest by clicking on the column name on your summary page view. To save paper, you can get the required information onto your screen by using the Advanced Search and Column Management.
Listing Brochures
How to create a listing brochure
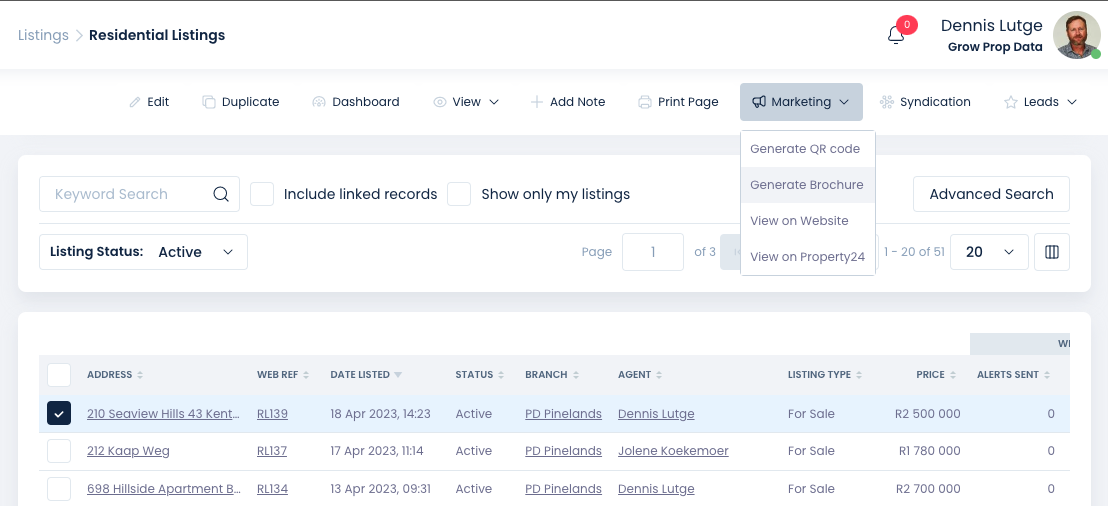
First, go to your Residential, Commercial, Holidays or Projects Listings module and click to open the summary page to find the listing/s you want to create brochures for.
Simply click on the listing you want to use for your Brochure by placing a tick in the checkbox next to the relevant listing (shown below). Now select the Marketing dropdown and then select Generate Brochure
.png)
A preview and edit page will now appear — this is shown below. Select the brochure you wish to use by selecting the Template dropdown, You can, for the specific brochure generation, change the agent and reorder the images. More on this in the next paragraph.
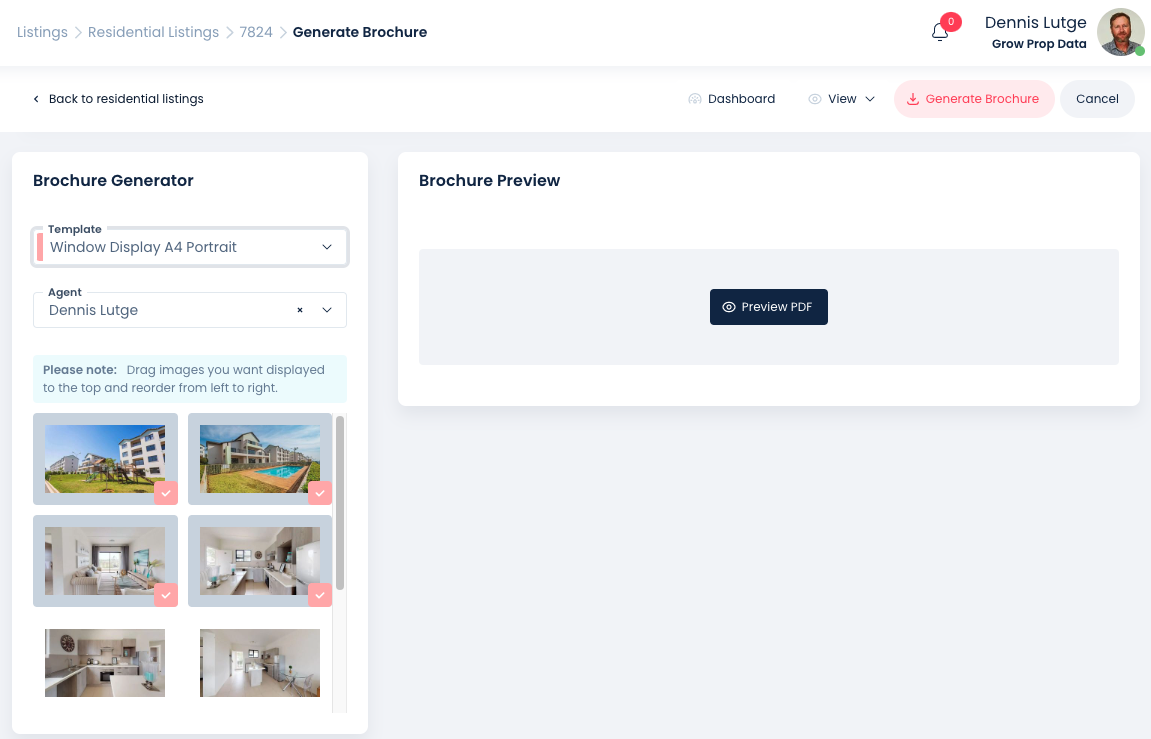
Depending on the brochure (custom or standard) you will be presented with a few options to the left of screen (Brochure Generator). You may be able to add more than one agent to the brochure, specify that the street address is displayed and so on. You are also able to change the image order, the number of images the brochure will display will be highlighted in grey, this can range from 3 to many (on custom designs). You are able to click and drag the images you wish to display on the brochure into the required position. See video below:
Note: Prop Data Manage has 3 standard brochures by default. These are Window display A4, Window display A4 landscape and Property Information A5 folded. We are able to create a multitude of custom brochures to suit your company's needs. Get in touch with your Prop Data Account Manager for more information on this service.
You are able to edit the Marketing Heading, Listing Description (brochures being limited by the size of the page and allocated text block may cut off long listing descriptions, edit the description to make it shorter so that all required text displays on your brochure), reorder your images and in some case add banners or listing addresses. Brochure dependant*
* Custom Brochures may allow for the above, dependant on your chosen design.
* * Changes made to listings while in the brochure generator will NOT affect your listing as it currently is on your website and the portals. Your edits will be for the current brochure generation only.
Use the + and - buttons to zoom in and out to get the full view of the brochure you have generated.
If you are happy with your preview, click on Generate Brochure at the top right of your screen. This will automatically begin the download. The brochure will be downloaded as a PDF which you can then distribute through any channel you wish.
You can generate the same brochure for multiple listings at once, see demonstration in the video below:
Underlined fields
On any given summary page, you will see columns with various underlined elements, as shown in the example below. Clicking on any of the underlined fields will take you directly to that detail whether it be a listing, a branch or an agent. This is shown in the example video below.
Shortcut Menu
On every summary page, you will see a shortcut contextual menu, as shown below. These are shortcut actions that you can take should you want to make changes to a specific detail on the menu. Any field that is underlined on the summary page, will have a shortcut menu. You can access the shortcut menu by right-clicking on the underlined field. In the example shown below, clicking on the underlined address brings up the contextual menu and from there we can access a number of options on the pop-up menu.
Hover Display
Certain fields on the various summary pages such as the listing Web Ref on the listing summary page and Contact name on the leads summary page will show you more details when you hover your mouse pointer over them. See video below:
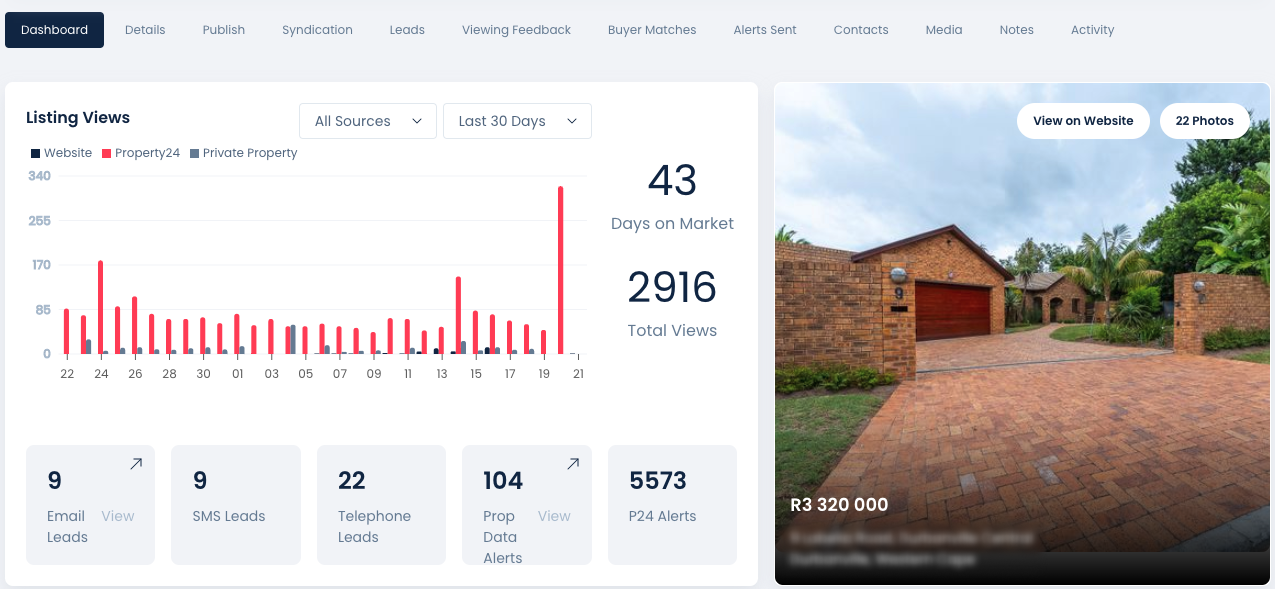
Dashboards
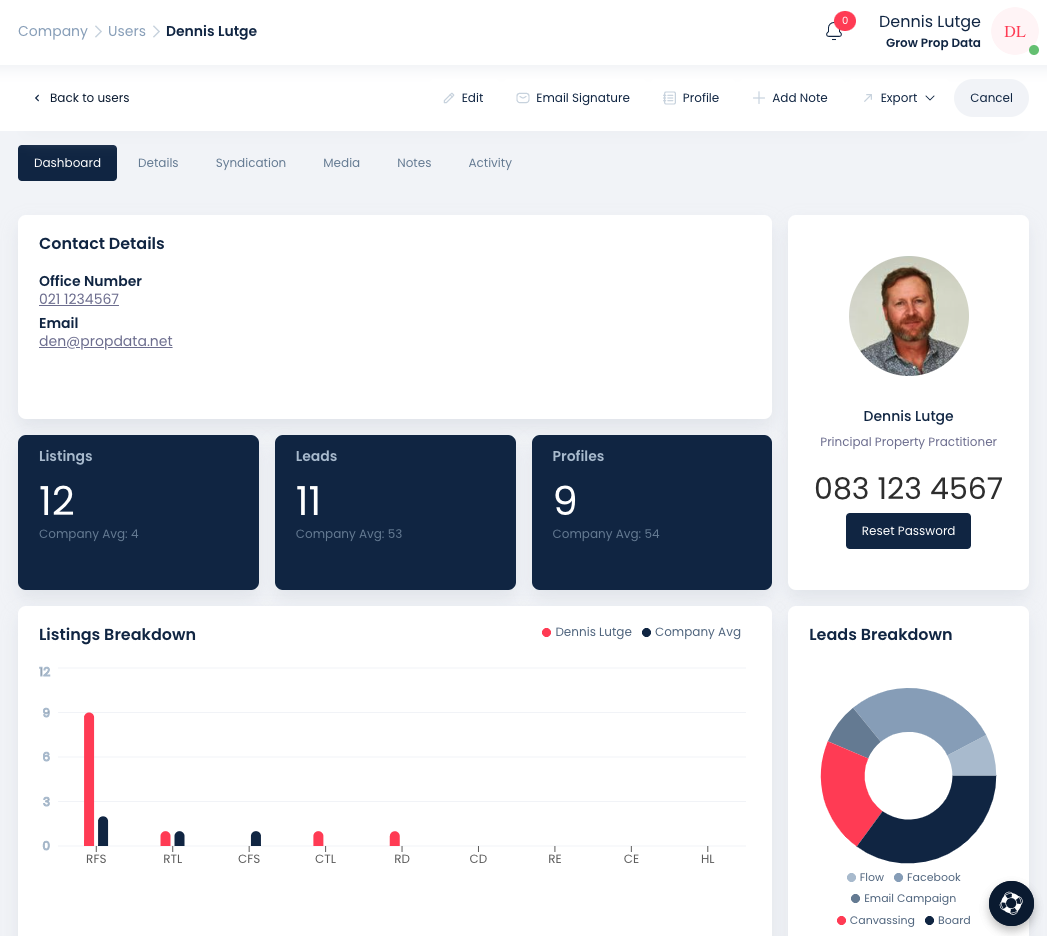
The Dashboard refers to the main overview of the subject of any given module. We will discuss the Dashboard of each module as we come to it but below you will see a quick overview of how to access the dashboard from any module summary page.
We have Dashboards for Branches, Agents and Listings. To access the Dashboard, simply select your desired branch, agent or listing from the summary page, as shown below.
You can select a specific branch, agent or listing by placing a tick in the box to the left of the Dashboard you wish to view. In the example below, we are on the residential listings summary page and we have selected a specific listing whose dashboard we want to view.
After you have selected the particular listing, branch or user, click on Dashboard on the top-right menu.

You can also view multiple dashboards at once. For example, if you want to view the performance of your five most recent listings, select those listings, then click on Dashboard (as shown above) and you will then be able to scroll between all 5 dashboards without returning to the summary page. To scroll between the various dashboards, use the paging options at the top right to move between each listing dashboards as seen in this image:
More information on each of the below Dashboards can be found under the applicable module i.e. Listings, Branches, Agents.
Branch Dashboard

Agent Dashboard
Listing Dashboard
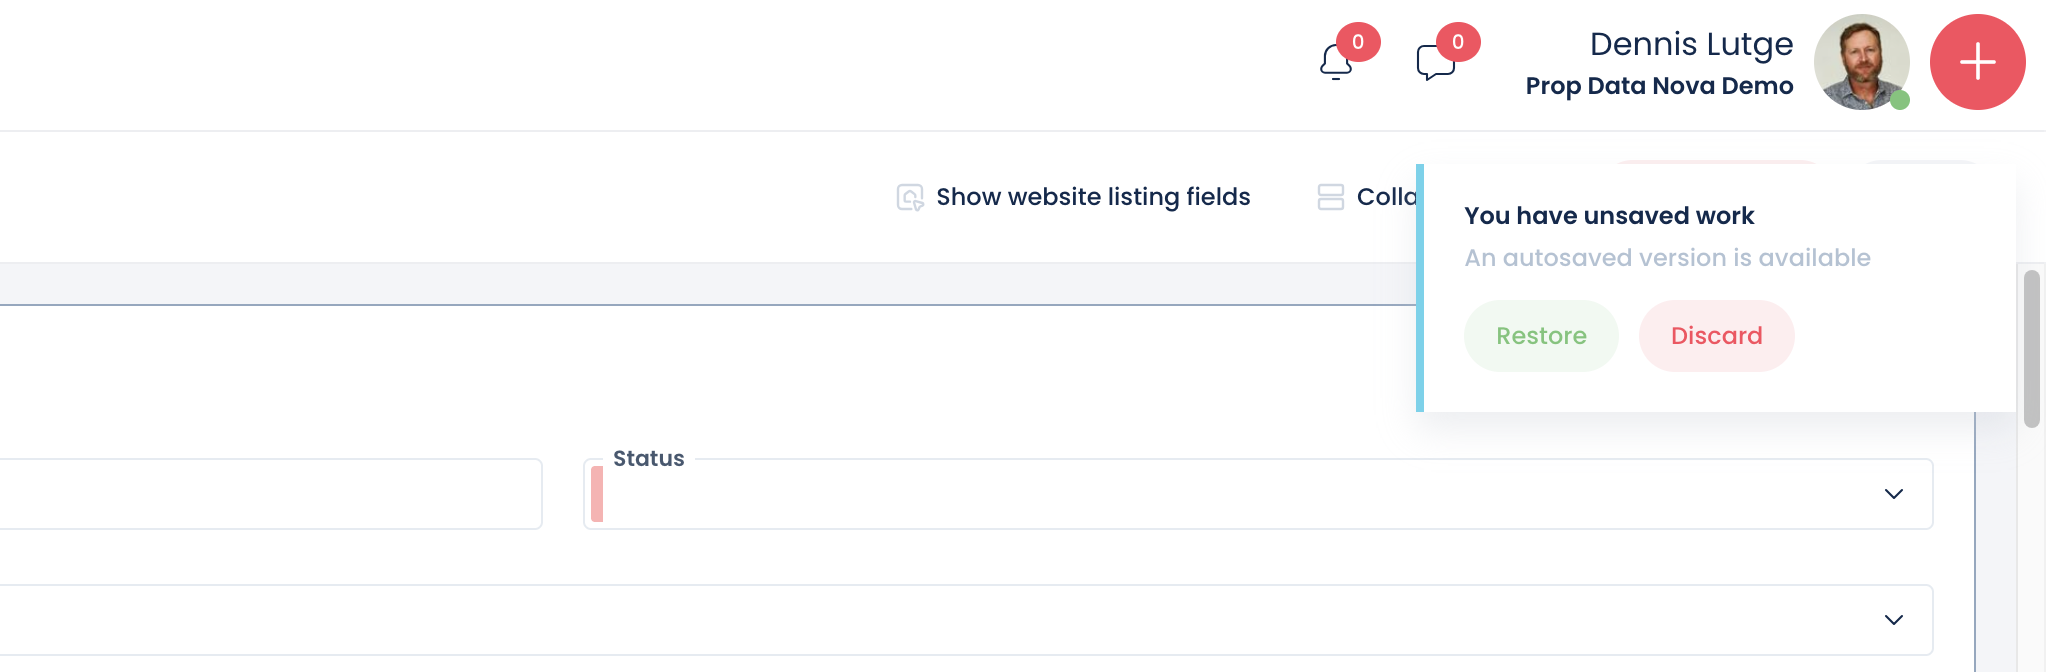
Autosaved
If you have had to step away from your computer to take a call or you have lost your network connection mid-adding a new listing, agent or branch, you can make use of our autosaved function.
Example: If you were busy adding a new listing and needed to leave the office and when you returned you had been logged out of the application.
- Step 1 : Return to the add listing page or go back to the same add or edit page you were on prior to being logged out.
- Step 2: Click on Restore
- Step 3: Continue where you left off.
NB: If your PC ran out of power or your cache has been cleared by an app or anti-virus software, the autosave restore may not be available.
Copyright © 2026 Prop Data (Pty) Ltd Privacy Policy