

Welcome
Welcome! To start, we'll show you how to log in to the correct URL and set up your password. To help you further, we have put the approximate reading time in each section. Let's get started!
General Discussion
This manual is being updated constantly. Please check back every now and then for new content.
About this Manual
Terminology Used in This Manual
Application/App/System/Manage: The Prop Data Manage proptech ecosystem.
Summary Page: When clicking on a menu item, Listings > Residential for example, the page that you land on will be the summary page. The summary page is an overview of the basic fields pertaining to residential listings (in this example) and the status will always be Active by default. The summary page is your starting point for adding and editing records.
Field: A field allows you to input your required data (text) either manually or using a dropdown menu, all fields within the system are named, for example, Property Type.
Multiple-select Fields: Certain fields within the system will allow you to add more than one option to them, these are known as multiple-select fields. These field types can be found in the Advanced Search, Listings add/edit forms, report generators, and so on.
Dropdown Fields (menu): A dropdown field will provide you with a predefined list of options that you can choose from. A few examples of dropdown fields are: Features and Amenities when adding/editing a listing, Status and the Agent field.
Slide-in options or Drawers: These are options that will move in over your current view, the Add Contact button, for example, while adding a listing will present you with additional options to complete via a slide-in menu.
Record: When you save a Contact or a Listing, for example, this then becomes a record. i.e. a Listing record or a contact record.
Checkbox: A block within the application to make a specific selection. ☑️
Add: Create a new listing, lead, profile, etc.
Edit: Change/update an existing listing, lead or profile.
How to Use This Manual
This manual is set up in much the same way as the menu structure for the application itself. To the left of the screen, you will see the main topics (Manage Docs) of the manual with clickable links to the section you wish to view. In the image below, these would be Getting Started and Dashboard, in the centre column (Contents) you will be able to view any sub-sections for the topic at hand. The content of each section will be displayed in the last column (Docs).
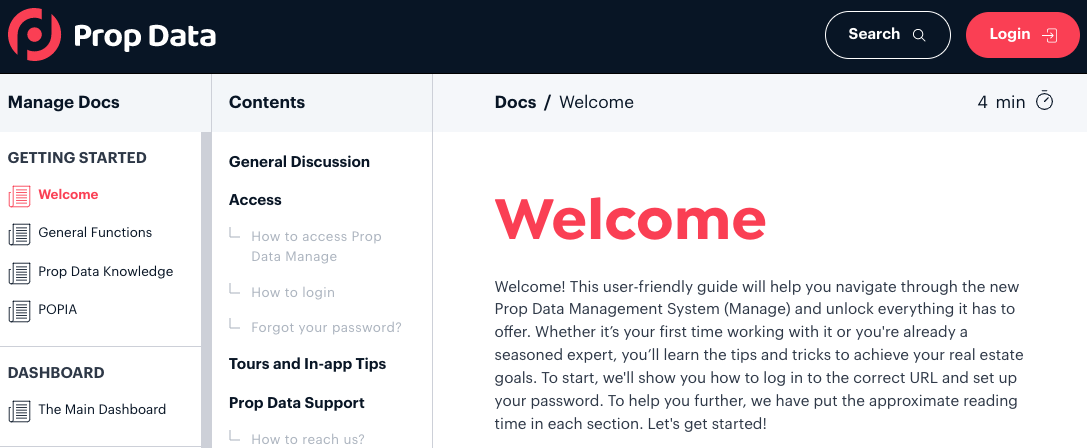
All of the text in the Manage Docs and Contents sections is clickable, clicking on any of the Manage Docs topics or on one of the Contents sections will take you to that particular part of the manual.
Key
Clickable buttons within the application itself will be highlighted as follows while navigating the manual: + Add New Listing
Field names that you will make use of within the application are written as they would appear on the application (capitalisation of the first letter of each word), On Show Date for example.
Hyperlinks (A link to another part of the manual) will be displayed as underlined text.
Important notes or highlights will be displayed like this.
Use CTRL and + to zoom in on an image then CTRL and 0 to return to normal view. CMD (Command) on Mac.
Use CTRL and f to find specific keywords within the content. For example, if you are reading through the residential listings part of this manual and want to find how to reduce your listing price, CTRL and F and type Reduced in the block that will appear at the top right of your browser. Again Mac users, use Command instead of CTRL.
The manual has many imbedded videos that you can view. To make the video full screen, click on the broken bracket icon at the bottom right of the video, as highlighted in the image below.
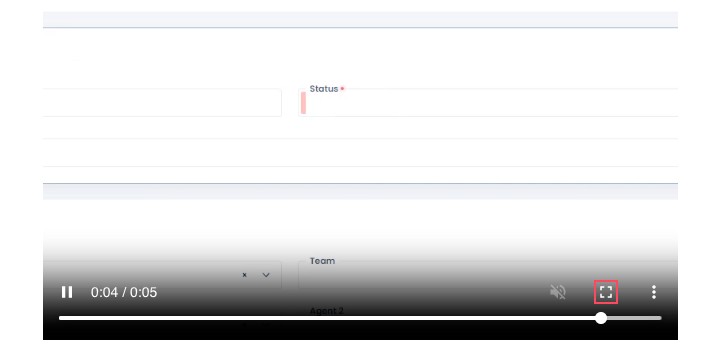
Once the video has completed, you can click on the inverted shape bracket icon to return to the manual.
This manual can also be viewed on your mobile device using the same URL: https://prop-data-manage-docs.webflow.io/doc/welcome
*The addresses, images, persons names and other data contained within this manual is for demonstration purposes only.
Prop Data Manage Site URL and Browser
For the best app experience, use only Google Chrome. Please ensure that you have the latest version of Chrome installed and a good broadband connection.
The Prop Data Manage app is fully responsive on all mobile devices. All you need to do is use the same link (URL) as provided below to log in.
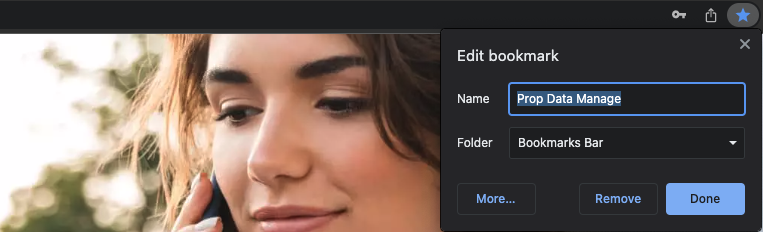
Add Prop Data Manage as a bookmark on your browser for quick access:
STEP 01
On your computer, open Chrome.
STEP 02
Navigate to Prop Data Manage (https://manage.propdata.net/).
STEP 03
To the right of the address bar, click on the Star on the far right.
Access
How to access Prop Data Manage
Your Principle, Branch Manager or Administrator will be able to give you access to the system. If you are an Owner or Franchisee, your Prop Data Account Manager will arrange initial access. On your account being added to the system, you will receive an email (please see the example below) which will show you your email address (to use this as your login address, please ensure that this is always typed in lower case). Additionally, the email will show you your User Group, which determines the access you will have to specific modules within the system.
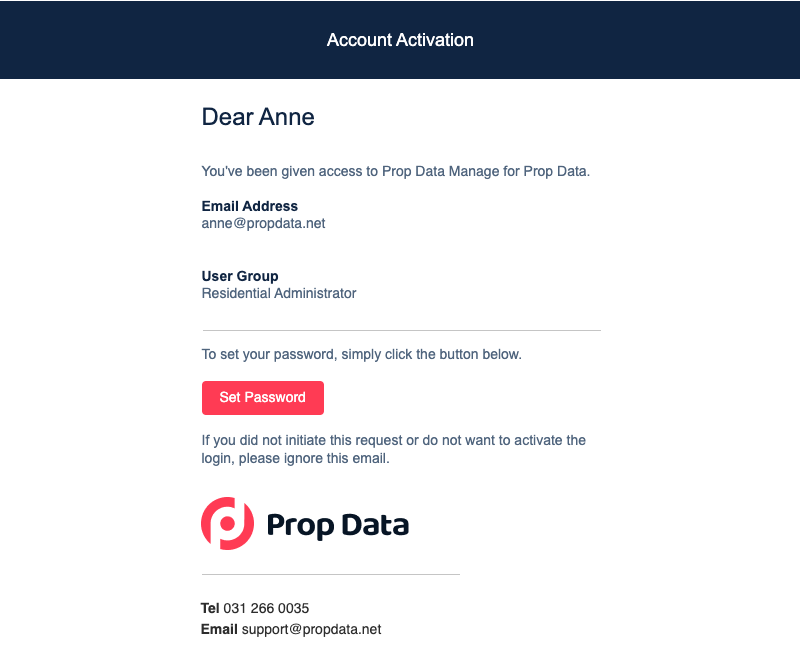
On receipt of the email, click on the Set Password button and enter your password twice — both passwords must be identical. Once completed, click on Set Password.
Here is an example of what your set password page will look like once you have clicked the Set Password/Sign in button:
.png)
Please note: your activation email is only valid for 24 hours after it has been sent. If the 24 hours are up, click on Forgot Password? on the login screen. We will resend you your activation email. Alternatively, please get in touch with your Branch Administrator/Manager if you are experiencing difficulties.
How to login
Your username (Email) will always be your email address in lowercase.
To access the Prop Data Management System, click the link: Prop Data Manage
Go to the above URL to access the login page — pictured below. Enter your login email and password, and then click Sign In.

Sign In with Google or Microsoft
If your company makes use of Google Workspace or Microsoft 365/My Workspace, once your password has been created you will be able to click on the Google button or the Microsoft button to log in automatically using your company account.
Note that your Google or Microsoft account email must be the same as the email address that has been added for your login email.
Forgot your password?
There's no need to worry. At the login screen, click Forgot Password? and the system will send you an email to reset your password. Alternatively your admin/management team can send you a password reset email from the agent dashboard under the Company module.
Prop Data Manage Version Update
When a new version of Prop Data Manage is available, you will be shown a popup notification at the top right of screen. Click on "Click here to update Prop Data Manage" to switch to the latest version. Version updates contain bug fixes and enhancements to the application and it is crucial that you perform the update.

Tours and In-app Tips
For each summary page and add/edit page, there will a tour that will start when you access a page for the very first time. The tour will familiarise you with the page layout and provide you with some useful tips along the way. The first tour that you will see will be The Main Dashboard Tour. Should you wish to restart a tour for a specific page, simply click on the Lifebuoy, then on Tours and then select the tour e.g. Dashboards Tour, as seen in the snippet below.
Please note: on smaller monitors, you might need to zoom your browser screen out slightly to find the Next button of the tour. To zoom your screen out, on Windows, press Ctrl and the minus key (-); on Mac press Command and the minus key (-). You can then press Ctrl/Command and the plus key (+) to get your screen back to your normal size.
We have also added in handy hints and tips which can be found when you hover your mouse over a pink flashing beacon.
Prop Data Support
How to reach us?
Should you experience any issues with logging in or while working within the app, there are a number of ways that you can reach our support team. The preferred method is an email sent to support@propdata.net.
An email is the best option as it allows us to create a ticket. This will have the date and time the issue was reported, who reported the issue, and what the issue was. We can then use our SLA (service-level agreement) metrics, problem categorisations, and priority queuing system as well as have an audit trail of all the work that has been done on your ticket. In this way, we can improve the support we offer you.
Alternate support methods
You will see a Lifebuoy icon at the bottom right of your screen:
.png)
When you click on the Lifebuoy, the Prop Data Help Centre will appear, as shown below. From the Lifebuoy, you will be able to chat with our Prop Data support team by using the Chat icon, as shown below, and at the bottom right of the Help Centre. The chat will connect you to our support team directly.
The Send Feedback button, shown below, will allow you to attach a screen shot or screen recording of your issue. This will then, on submission, send an email automatically to the Prop Data support team with the information you have entered.
.png)
You can also contact our support team telephonically on 031-266-0035.
Support hours:
Monday–Thursday: 8 AM to 5 PM
Friday: 8 AM to 4:30 PM
You are welcome to email support on weekends and public holidays. We do have a representative who will look at your query during these times between 9 AM and 3 PM.
Remote Software
There may be times where our support representatives need to remote into your computer and assist. This can be done via AnyDesk or Chrome Remote Desktop. Select your preferred method below:


Copyright © 2023 Prop Data (Pty) Ltd Privacy Policy