

Valuations
A branded Valuation report that leverages Lightstone data... Yes! Our Prop Data Manage Valuations report lets you stand out from the crowd, read more about this great add-on service below.
Valuations Module Overview
Savvy sellers know that opening their home to multiple agencies to get an accurate evaluation of their property is the way to go. But, how do you make your report stand above all of the other valuation reports that will land up in the sellers inbox or on their desk? Read more below as we show you how to create a branded valuation report, how to personalise the report and how to bring in comparative properties to "back up" your your assessment of the property. As this is an add-on service that we offer, the option may not be available to you. Please chat to your Prop Data account manager to get more details and how to sign up.
Lets start by looking at the Summary page layout, image below:

Keyword search
At the top left you will see the Keyword Search bar (as seen in the picture above). Here you can search for any report with the address, sellers name, branchand agent name. The Keyword Search works best where a short (one or two-word) input has been added.
Activity tabs
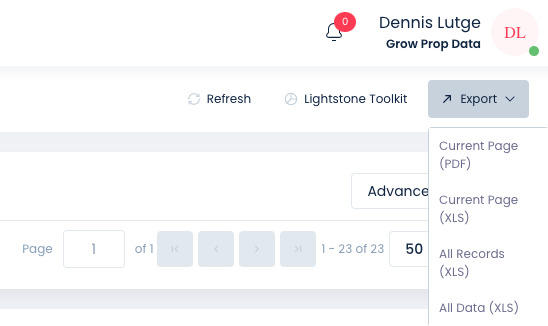
At the top right of the Valuation summary page, you will see three activity tabs, as shown below. These are Refresh, Lightstone Toolkit, and Export. Please note that depending on your access level (User Group), you may not have the Export button.

Refresh
Clicking Refresh will refresh the summary page with any new Valuations that have been created and show status updates.
Lightstone Toolkit
Clicking on the Lightstone Toolkit button will route your browser to the Lightstone toolkit login.
Export
The Export function allows you to download an Excel or PDF version of selected listings/fields or all fields you have selected or you can download a complete summary of all the records on the system. The export tab will open a drop-down, showing the options available as shown below. Read more about the Export function here.
How to Add a Valuation Report
Click on the + New Valuation Button, as seen below.

You will be presented with the add Valuation Report form, as can be seen in the below short video, note the required fields in Red, these fields must be completed before attempting to save your report.
Lets now navigate through each section of the report. Starting at the top of the form and working your way down is preferable.
Page Details
You will be presented with 2 required field under this section:
Status: You can only select the Draft status when first creating a Valuations Report.
Template: Select the required Template, if your company has elected to have a custom report created by Prop Data you will be given the option in the Template dropdown. Our default will be Standard Valuation.

Prop Data is able to create custom reports for your company, please chat to your Prop Data account manager for more information.
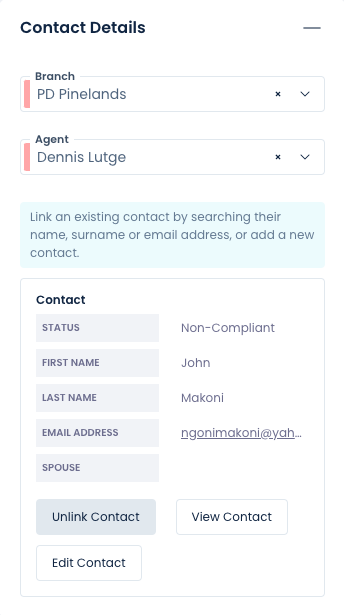
Contact Details
The Contact Details section of the report will contain the Branch, Agent and the Seller (Contact).
Branch: Select the branch you wish to create the report under. Note that if your branch does not appear in the dropdown list, to please contact your Prop Data account manager.
Agent: The agent who will be presenting the report and who will hopefully be given the mandate to sell the property. Select the agent from the dropdown list.
Contact: Add New Contact if the seller does not exist on your database, or Search Contacts for an existing contact to associate as the seller.
Ideally, you should search for a contact first to establish if the contact exists within the branch. The best way to search for a contact is by using their email address (as this is a required field when adding a contact) or you can also use a combination of first and last name or just first or last name. However, your results may not be very specific in this case. Should the contact already exist for the branch then choose the contact by selecting the + icon.

If you do not get any results from your contacts search, you will then click on the Add Contact button and a slide-in menu will appear from the right of your screen with the Add Contact form displayed. Please note the required fields on the Contact Add form in the image below. All required fields must be completed before the contact record will be saved and associated with your report. Once all fields (required and any additional fields of your choice) have been completed, scroll down the form and click on Save.
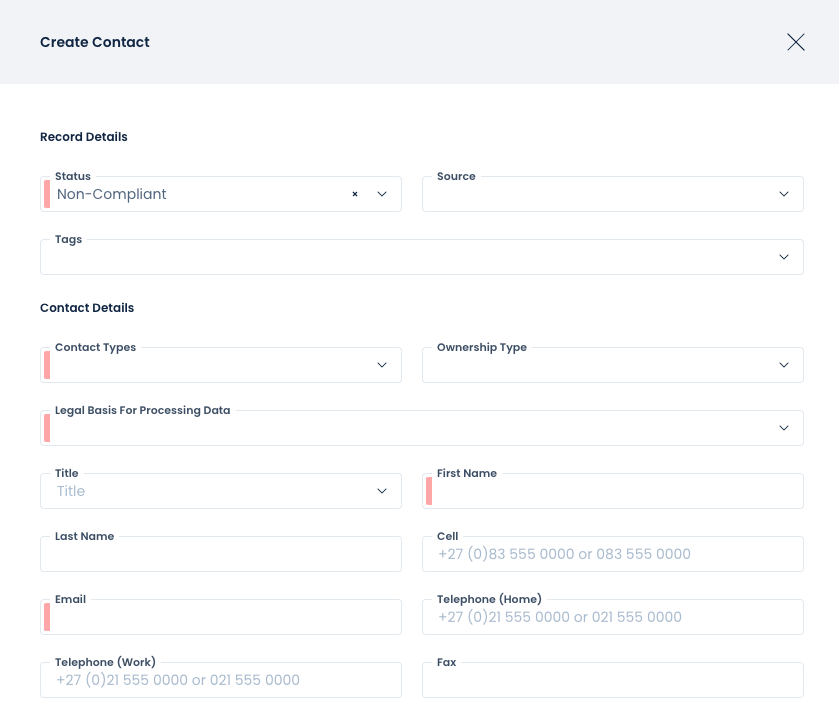
Status: Due to POPIA, you may not add contacts in an Active status onto your system (South Africa only). Specify Non-Compliant or Inactive, whichever is applicable, Non-Compliant being preferred. Important: On saving the record, the contact will be sent an opt-in mailer from your company.
Contact Types: These can be one or all of (multiple select): Buyer, Seller, Tenant, Landlord, or General Enquiry.
Legal Basis For Processing Data: As a POPIA requirement, specify why you are adding this person's information. Generally, for a sole/exclusive/joint mandate, you would select "Freely Given Consent from Contract" as you would have a POPIA clause contained within your mandate agreement.
Email: This must be a valid email address on a valid internet domain. The system will verify the domain and alert you if the domain is not valid.

Branch: This field will be defaulted to the branch the agent belongs to.
Primary Agent: The agent who will be designated the 'owner' of the new contact record.
Associated Agents: Here you can add any of your colleagues that you wish to have access to the contact record by selecting them from the Associated Agents dropdown. This is user group access dependant.
Your Prop Data Manage system is fully POPIA compliant!
Property Details
The Property Details section allows you to now specify the Listing Type, identify your listing on Lightstone and supply the suburb for the listing.
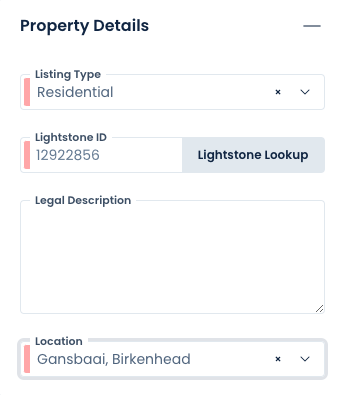
Listing Type: Select either Residential or Commercial.
Lightstone ID: A crucial step, the property must be identified on Lightstone for the report to be generated. More on the Lightstone ID below:
Legal Description: Once your report has been saved in the next step, the Legal Description will be populated automatically from the Lightstone data we receive. Do not add any text here.
Location: Select the correct suburb for your listing, yiu can type the first few letters of the required suburb to make the search easier.
Lightstone Lookup
Prop Data has partnered with Lightstone to allow you to identify your listing on Lightstone via their API. The Lightstone lookup is provided free of charge to Prop Data clients.
To identify your property on Lightstone, click the grey Lightstone Lookup button.

A slide-in menu will appear at the right of your screen as shown below:
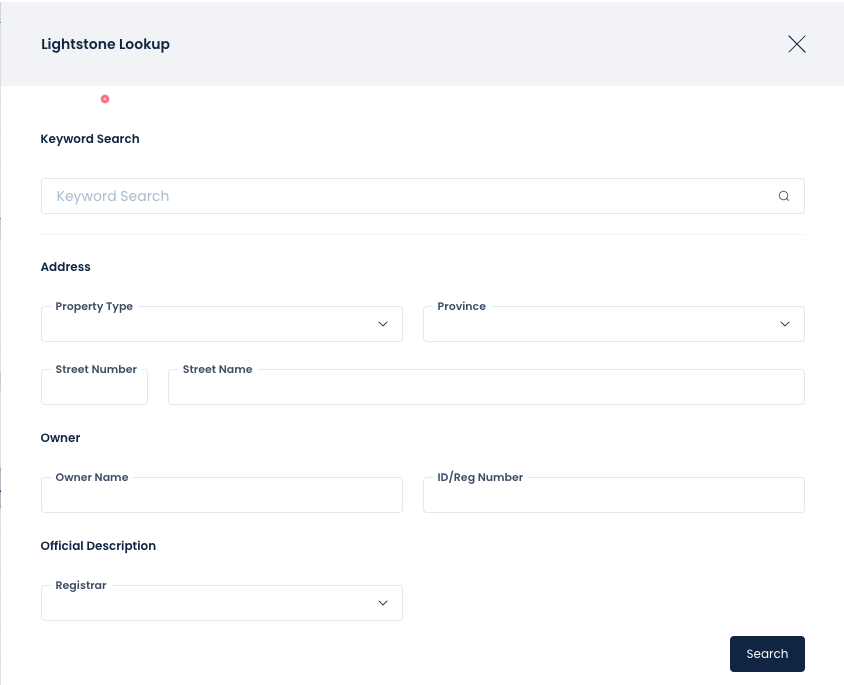
The easiest way to find your listing is by using the Keyword Search. Enter your seller's identity number, Surname Name or the listing address (street number and name).
The relevant results will be returned when you click on Search. Now use the + button in the search results to associate the Lightstone record with your listing.
The Lightstone Lookup will populate the following information into your new listing record:
The Lightstone ID, the properties street number and street name, the ERF number, any sectional scheme details and the properties coordinates. We suggest that all new listings be identified on Lightstone for your records.
Save your Basic Setup
Now that you have completed the above required fields, save your report by clicking on the Save Valuation button at the top right of screen. Do not populate any of the fields in the Select a Section to Edit section at this point, this will be covered in the next step.
Customising Your Valuation Report
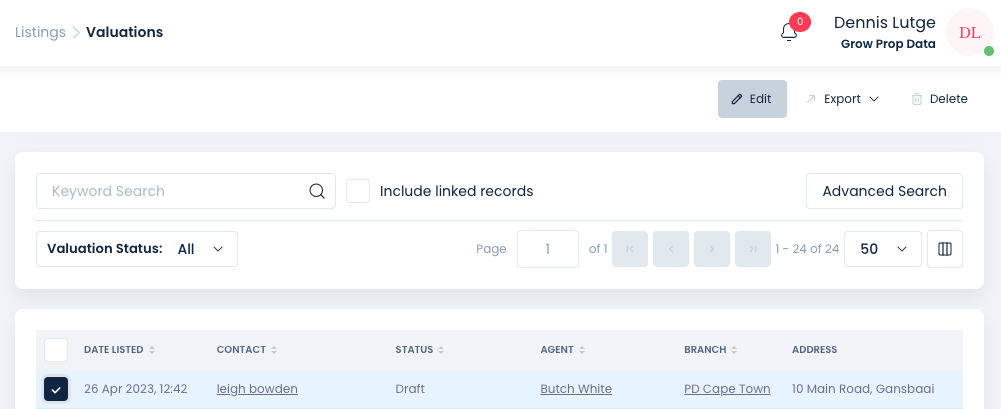
Once Save Valuation has been clicked you will be taken back to the Valuations Summary page. In this section we will show you how to add information to the various parts of the Valuation Report, this is where you can stand out from the crowd.
Select your Valuation by using the checkbox at the left of screen. You will notice that your Valuation is in the Draft status. Now click on the Edit button towards the top right of screen.
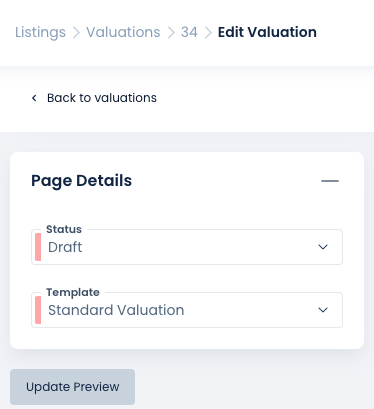
You will be taken to the edit Valuation form.
Now click on Update Preview at the top left of the edit page, just below Page Details: Clicking this will generate the basic layout of the report.
Have a look at the video below: We click on Update Preview and our basic report layout generates, then we scroll down the report to show what data has been pulled in from Lightstone for your listing. We will break down each section of the standard Lightstone data that has been imported below the video:
Breakdown of the Standard Report Parts
The data that has been ingested from Lightstone is now presented on the report, lets go through the layout of the report and what data has been pulled in.
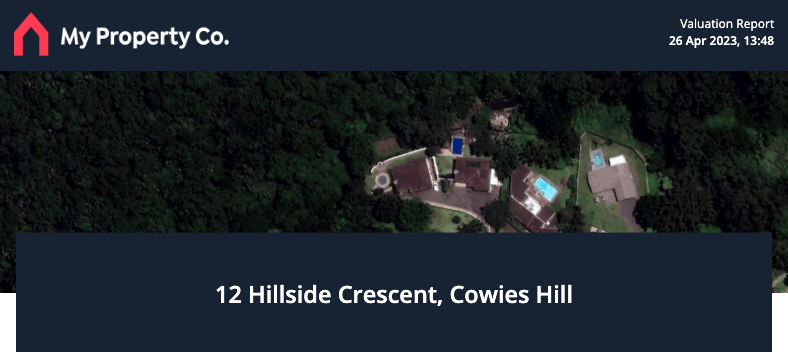
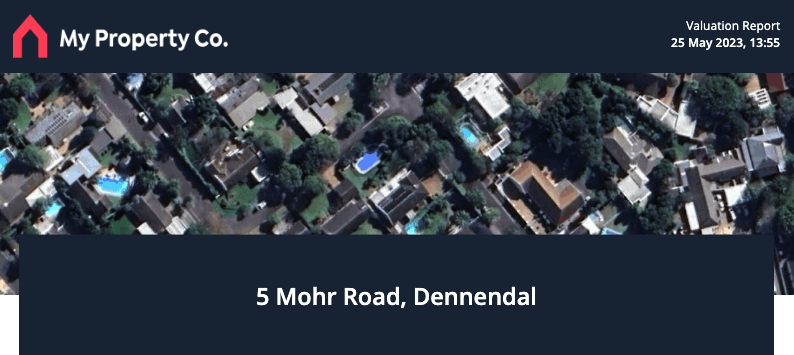
Header Image (Top image)
Here we populate the aerial view of the property and list the street address (you are able to edit what displays in the address section which we will cover when we setup the user input part of the report).
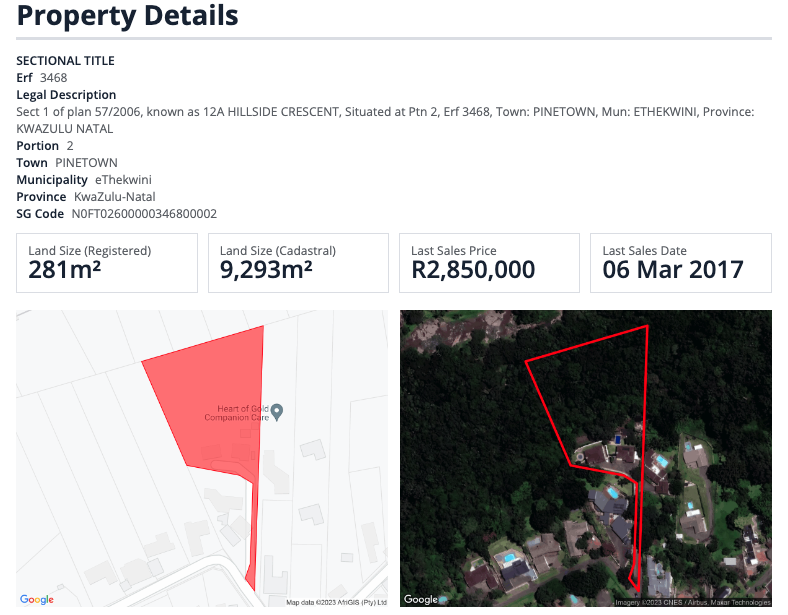
Property Details
The property details are populated from Lightstone data, title, Erf, Legal Description and so on. The land size, last sales price and last sales date are also populated along with 2 additional aerials views of the property.
Owner and Bond Details
Under these sections you will find the current owner/s, their particulars and if the property is bonded, the institution and bond amount.
Municipal Valuation

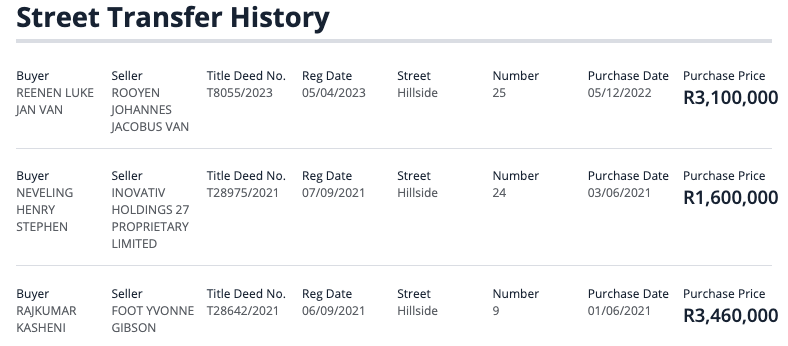
Street Transfer History
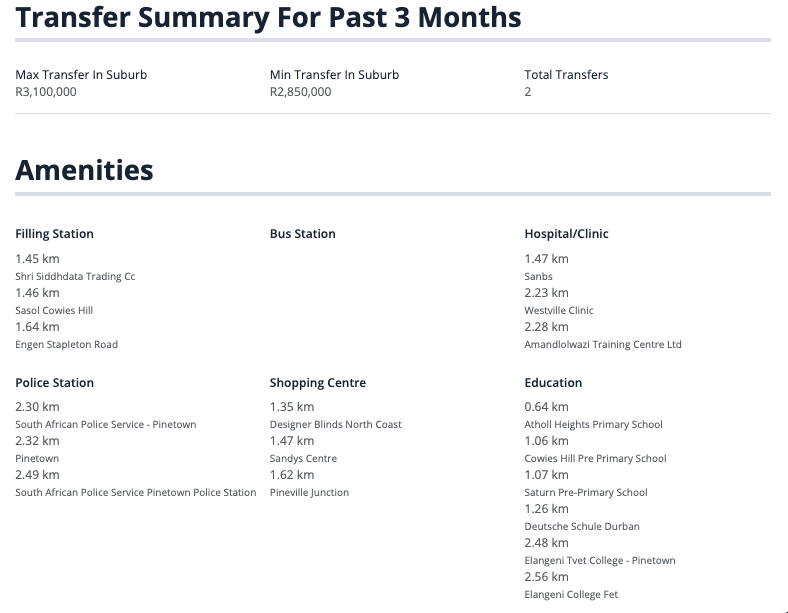
Transfer History and Suburb Amenities
Editing Your Report
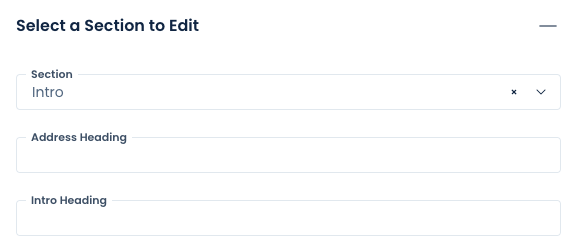
On our standard template the above data will be pulled in by default and cannot be changed. You are now able to customise what your seller/s will see on your report by making use of the sections in the Select a Section to Edit part of the report, we will go through each section of the editor below:

Intro
The Intro section has been added so that you can introduce your agency to the seller. Here you can state how long you have been operating within the area, your agencies success rate within the area and why the seller should choose your agency. As the Intro section contains an HTML rich text editor, you can add hyperlinks (link to your website or agent page),add bullet points, add headings and bold text.
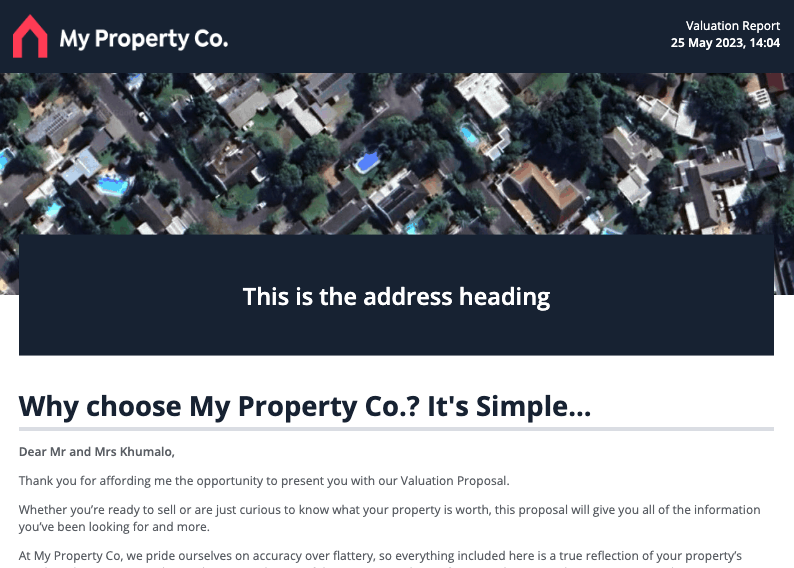
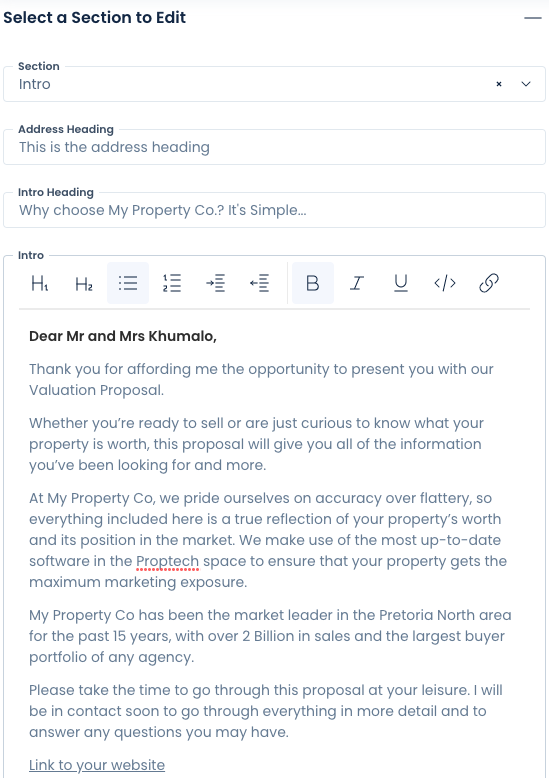
Address Heading: Leaving this field blank will automatically add the address as derived from Lightstone, however you can replace this by adding the text you wish to display on the report.
Intro Heading: Here you can add an introduction to your agency, We have added : Why choose My Property Co.? It's Simple..
Intro: Now add the text you wish into the Intro section, to make the process quicker, you can save your intro to a Word or Google Doc and copy/paste to the report then add any additional text you may require. See how to add some rich text to your Intro in the video below:
Once you are happy with your intro click on Update Preview.
Use Snippets to add predefined text into the intro section, instead of typing this out for every report. Read more Here.
That concludes the Intro section, see completed intro below:
Recently Sold
Our next section to complete is Recently Sold, here you will be presented with properties that have been recently sold within the area, this data is pulled directly from Lightstone. Select comparable properties by using the checkbox on the left. When complete, click on Update Preview
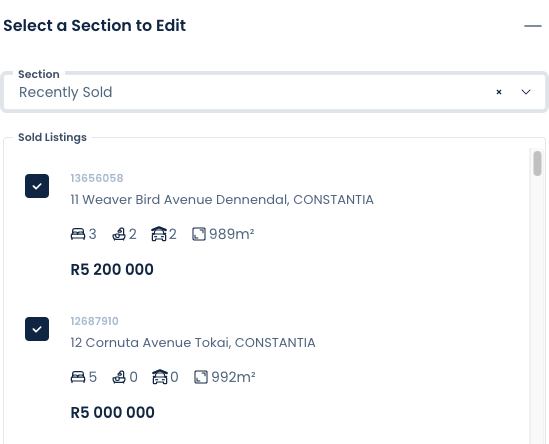
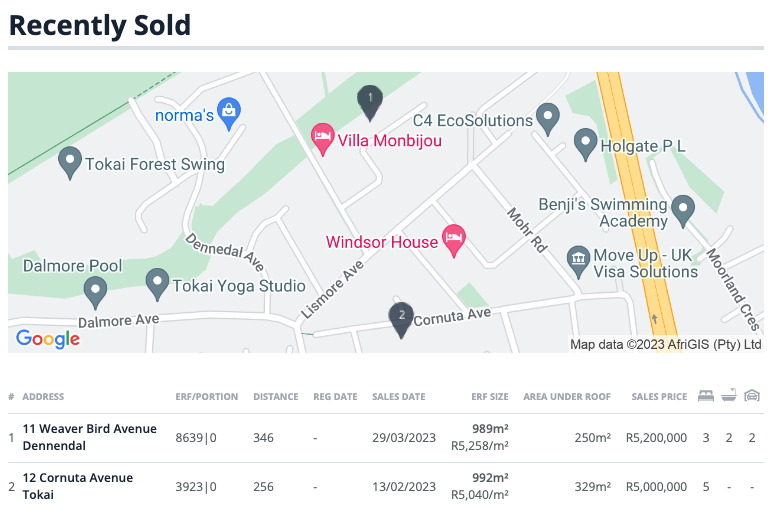
The properties that you select will then display as below on your report:
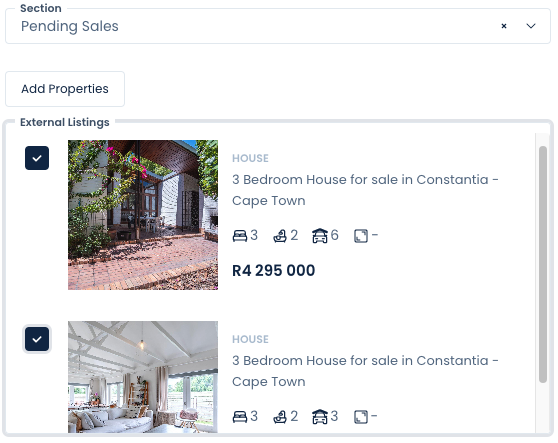
Pending Sales
In this section you are now able to select comparable sales within the area from your own listing database (Recommended Listings), you also have the ability to add links to Pending (Under Offer) listings on Property24.
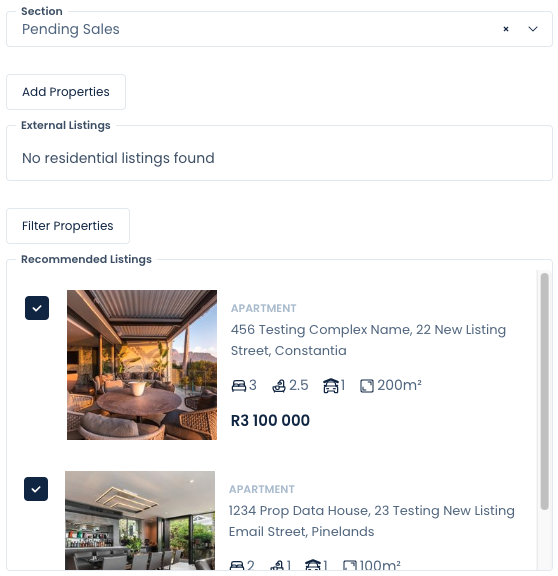
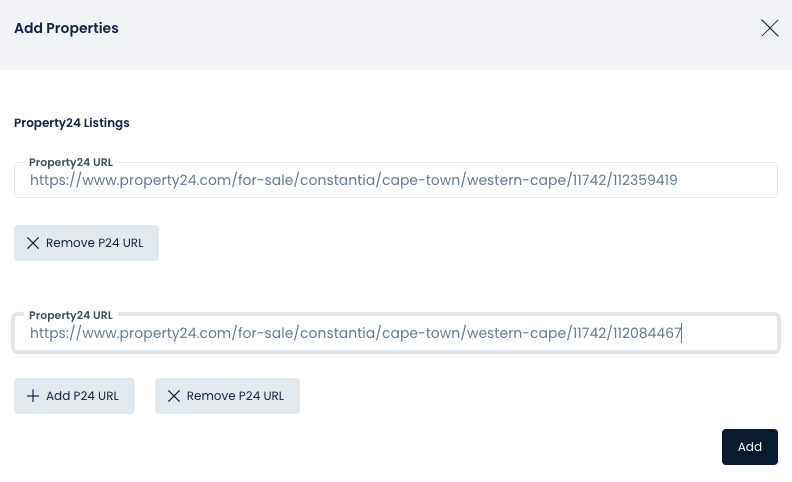
Click on the Add Properties button to now add links from comparable listings on P24. A slide-in tray will appear from the right of screen. Head to P24 in a new browser tab and find the Pending listings you wish to compare to the listing you will be evaluating.
Copy and paste the URL (full web address) and paste this into the Property24 URL field, repeat this process until you have all the required properties added. Once done, click on the Add button at the bottom right.
The properties you have elected to display will now be available for selection under the External Listings section.
Filter Properties: Clicking on the Filter Properties button will give you two additional options to narrow down listings that are close to the listing you are adding the report for, you can filter by Radius From Property and Property Types. The Radius From Property filter relies on the premise that you have mapped your existing listings (Google maps Pin) when you added the listings to Manage.
The listings you have selected for Pending Sales will reflect as below on your report once you have clicked on Update Preview:

Current For Sale
Here you will add properties that are currently on the market for comparative purposes. Adding properties into this section is done in the same manner as Pending Sales above.
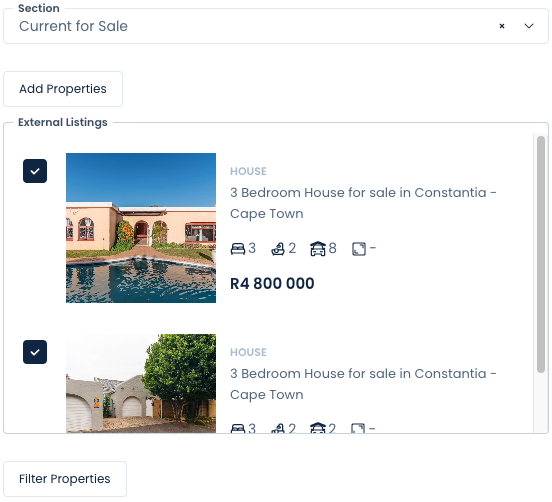
Once you have selected all relevant properties click on Update Preview. Your report will now contain the listings you have added as Current for Sale, i.e. On the market.
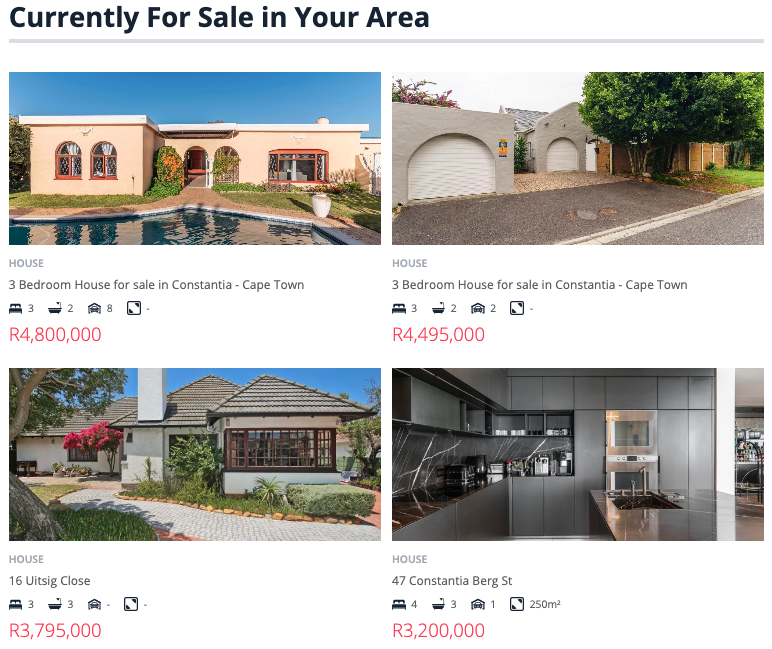
Try to limit your comparative Pending Sales and Current for Sale listings to six properties where possible.
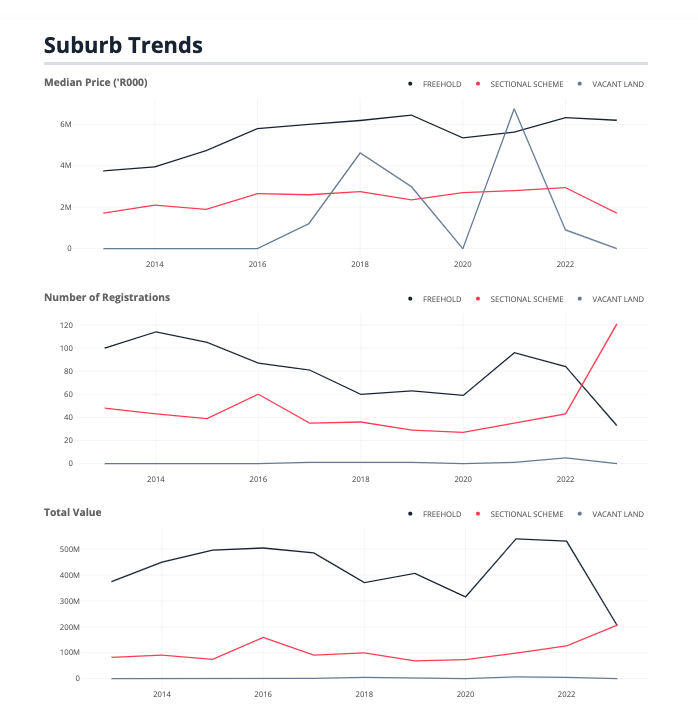
Suburb Trends
This data is pulled directly from Lightstone and will be populated into a graph, you can elect to display the graph or not to display the graph.
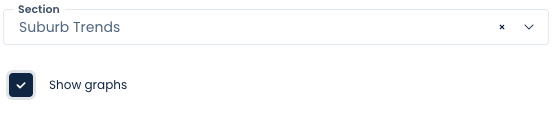
Should you elect to display the graph of suburb trends, the below image will be added to your report:
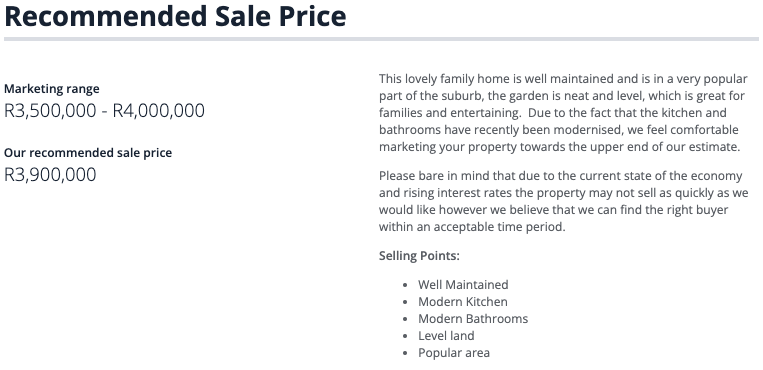
Recommended Sale Price
In this section you will be presented with a few fields to motivate for the selling price you feel the property is worth. Add your Marketing Range From and To pricing as well as your Recommended Sale Price.
Motivate why you have come to this value by using the Motivation rich text editor. See example below:
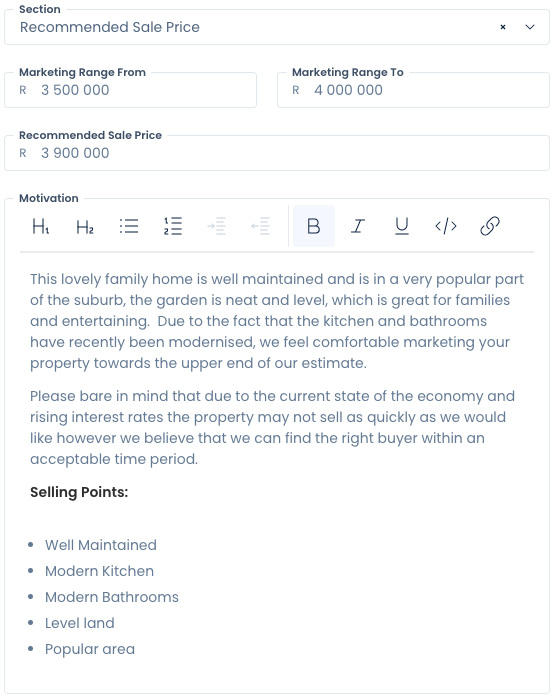
Once completed Click on Update Preview, Your recommend pricing will display as below on your report:
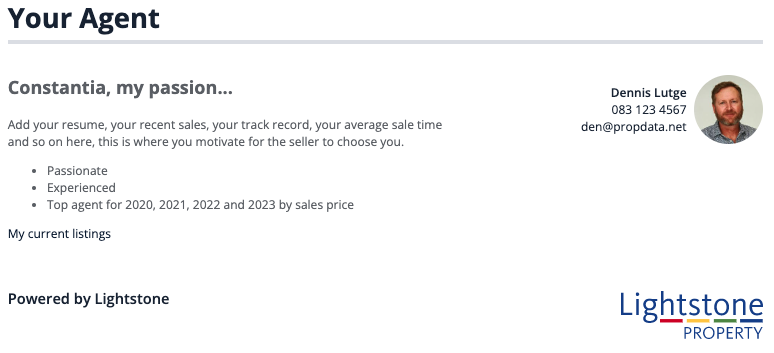
Your Agent
This is the last section to complete for your report. Here is where you will highlight your record as an agent, who you are and what you will do for the seller, essentially providing the seller with information on why they should choose you, above others that will surely be asked to evaluate the property. In this section you can add your resume, a link to your sold properties on your website and why you are the perfect agent for their property.

Once you have completed the Signoff section and clicked on Update Preview your report is now ready to share or to send for approval.
Use Snippets to add predefined text into the Your Agent section, instead of typing this out for every report. Read more Here.
It is not necessary to click Update Preview on completion of each section, however clicking on Update Preview will allow you to see how the section fits into the report.
Requesting Approval and Approving Valuation Reports
Depending on your User Group access level, you may have access to approve your own Valuation reports or you may need your admin/manager/franchisee/agency owner to view the report and then approve the report on your behalf.
If you do not have approval access you will be presented with a Request Approval button at the top right of screen.
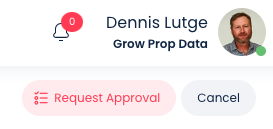
Clicking the button will trigger an email alert that will be sent to the persons who have approval access, on review your report may be Rejected or Approved.
Once approval has been gained you are now able to share your report with your sellers.
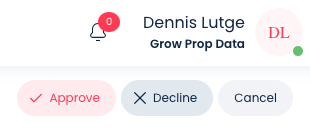
Approvers please note: To approve a valuation report, edit the report, review that you are happy with the report and either Approve or Reject the report based on your assessment.
Sharing your Valuation Report
Once the report has been approved, you will be presented with 5 (five) new options.

Download PDF: Download the report directly onto your local hard drive, you can then share the report via email.
Email Report: Your seller contact will need a valid email address in order for you to email the report directly to them.
Copy Report Link: This is a URL that will direct your seller to the report online.
WhatsApp Report: Your seller will need a valid cell number and the report link will be shared via WhatsApp.
Convert: Clicking on Convert will open a add residential or commercial listing form and populate certain fields for you. You can now proceed with listing the property.
Copyright © 2023 Prop Data (Pty) Ltd Privacy Policy