

Leads
In this chapter we will go over the Leads section of the Clients module. This is an important chapter for all agents who wish to maximize their Lead potential and improve lead tracking, communication and buy in.
Lead Overview
A lead is an enquiry made by a potential client on a specific property. The enquiry is added via a contact form either on a property portal pertaining to a specific listing or through your Prop Data website. A lead is then generated automatically by the system. The system will first create the contact which is the basic information for that lead (you cannot have a lead on the system without there being a contact created first) then it will associate the lead to the contact record and be recorded as an enquiry on a specific listing.
The second way that a lead can be generated on the system is if an agent obtains that lead from another source e.g a walk in to a branch, a social media DM regarding a specific property and the like. The agent will then manually add that client to the system as a new contact and then add the lead to the specific property that was enquired on. It is highly advisable that agents manually add leads to the system so that they can then track that lead and all communication via the Lead Stage Flow. All leads and updates around Viewing Feedback can be added to the seller feedback report which provides the seller/landlord accurate feedback on all enquiries pertaining to their property.
How to Add a New Lead
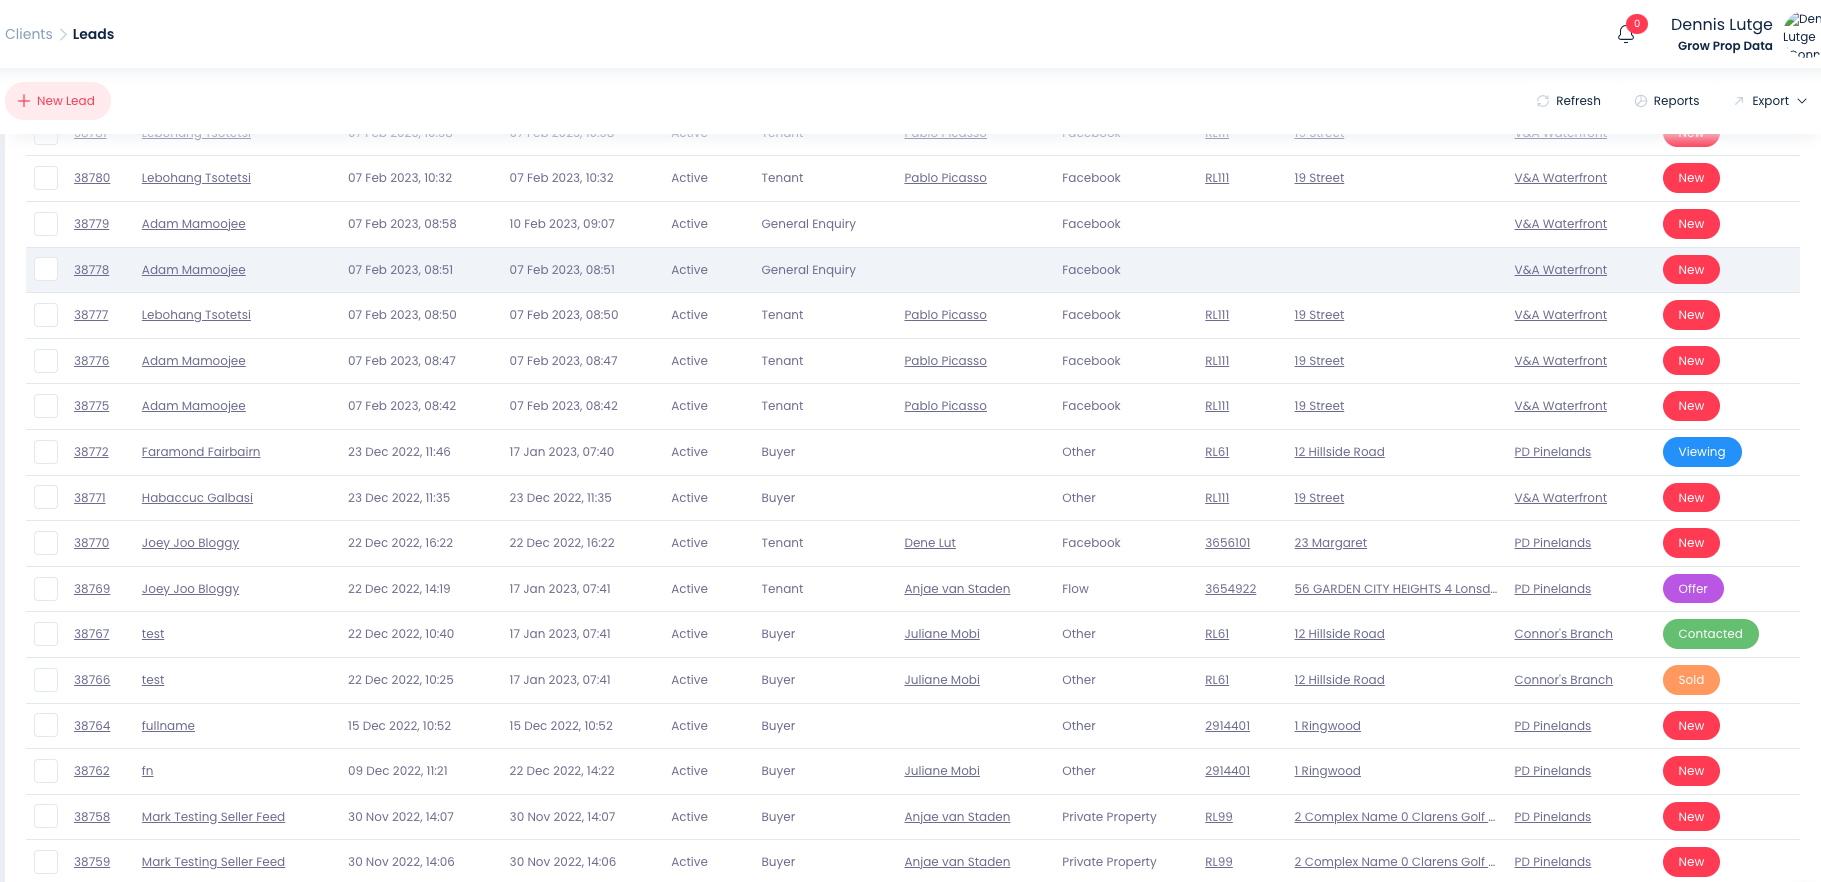
For agents who would like to manually add a new lead to the system, first go onto the leads summary page, shown below. This can be accessed via the Clients module of the system. The leads summary page is an overview of all leads on the system - active and inactive.
The leads summary page is an overview of all leads on the system, the default status displayed will be Active leads. Use the Status dropdown to access the other POPIA status types: Non-Compliant, No-Consent, Inactive or All.
How to Add a New Lead
To add a new lead, click on the New Lead button on the top left.
.png)
The below images show the + New Lead form, note the required fields in the image below:
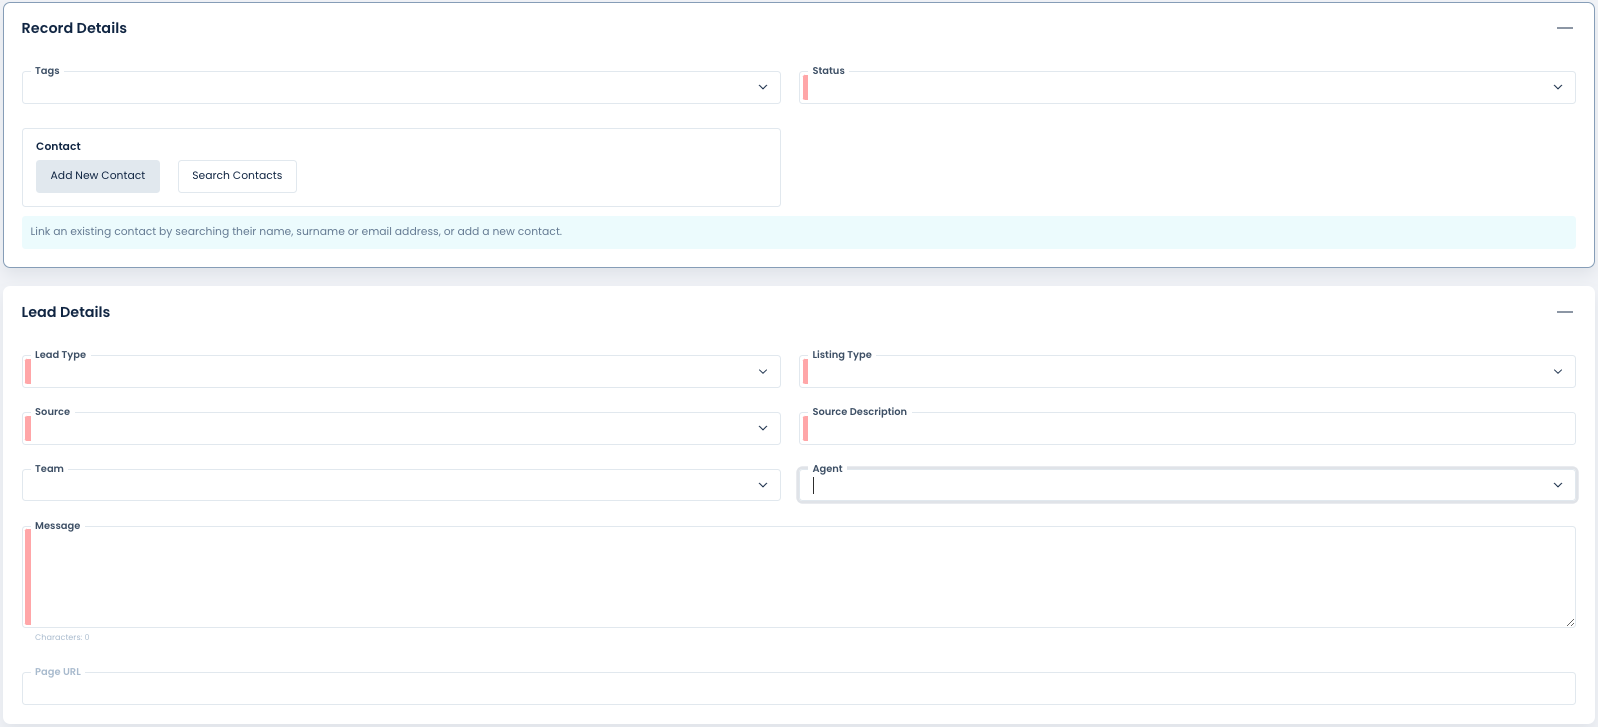
Record Details
Tags: Tags are useful in the case where a field does not exist within the system already. Depending on your access level (User Group) you may be able to added tag or you will be presented with a list of tags that have been added by your management team. it is not necessary or efficient to add a tag for a field that exists within the lead add/edit form, adding a tag for suburb or lead source tag is counter-productive as you can search for those fields with the Keyword Search and Advanced Search.
Useful tag additions for a lead could be: Cash Buyer, Plot & Plan, Cash & Bond or Urgent Buyer.
If a tag/s has been added to a lead you will be able to use the Advanced Search function and find the tagged leads or use Tags column on the summary page (Column Management) to find your tagged leads. Read more about adding Tags here.
Status: Due to POPIA, you may not add leads in an Active status onto your system (South Africa only). Specify Non-Compliant or Inactive, whichever is applicable, Non-Compliant being preferred. Important: On saving the record the contact to which you associate the lead will be sent an Opt-in mailer from your company.
Add Contact or Search Contact:
To associate a contact with your lead, select either Add New Contact or Search Contact.
Ideally you should search for a contact first to establish if the contact already exists within the branch. The best way to search for a contact is by using their email address (as this is a required field when adding a contact) or you can also use a combination of first and last name or just first or last name however your results may not be very specific. Should the contact already exist for the branch then choose the contact by selecting the + icon.

If you do not get any results from your contacts search you will then click the Add Contact button, a slide-in menu will appear from the right of screen with the Add Contact form displayed. Note the required fields on the Contact Add form in the image below, all required fields must be completed before the contact record will be saved and associated with your lead. Once all fields (required and any additional fields of your choice) have been completed scroll down the form and click on Save.
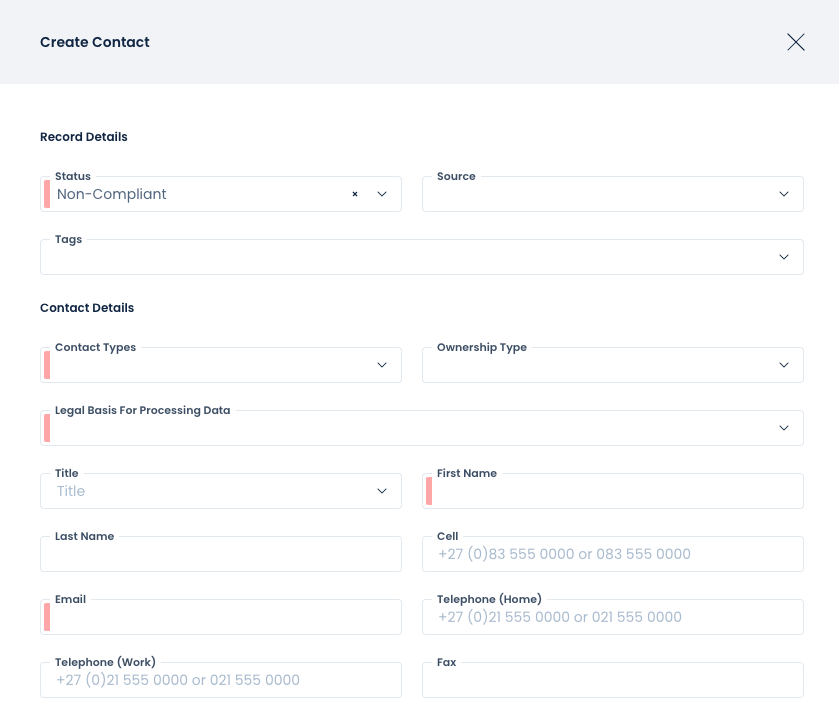
Status: Due to POPIA, you may not add contacts in an Active status onto your system (South Africa only). Specify Non-Compliant or Inactive, whichever is applicable, Non-Compliant being preferred. Important: On saving the record the contact will be sent an Opt-in mailer from your company.
Lead Type: Select
Listing Type:
Source:
Source Description:
.png)
STEP 04
Once you have completed all fields, save your lead by clicking on the Save Lead button on the top right.
.png)
You can also add a lead directly from your listing, see video below:
How to Update the Lead Stage Flow
In the new system, we have added a useful function called the Lead Stage Flow. This is a useful tool agents can use to log and update all communication pertaining to a specific lead. The benefit of this is that agents can keep a detailed track record of where they are at with each lead, they can also archive them if they are no longer active. As long as the lead flow is updated regularly, the system will keep an accurate record of all leads which is also useful when generating feedback reports for sellers and landlords.
STEP 01
The Lead Stage Flow can be accessed in a variety of ways. For this example, one of the easiest ways is to search for the lead you want to update and then adjust the lead stage flow.
STEP 02
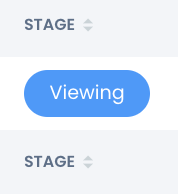
Go to the lead summary page and search for your lead. Once you can view the lead, you can access the Lead Stage Flow directly from the ‘stage’ column as shown below. Under the stage column on the far right, you will see the stage your lead is at. The below example shows that this client is currently in the ‘viewing’ stage:
.png)
STEP 03
Click on the ‘Viewing’ button to access the Lead Stage Flow for the lead.
STEP 04
The next form will show you the Lead Stage Flow. You can observe which stage your lead is at by viewing the timeline with the coloured ticks above each stage. From here you can log a new communication, viewing information or an offer. In this case, the lead is currently viewing the property but perhaps has a concern regarding the location. To add this update onto the system, you will click Log Viewing.
.png)
STEP 05
Now fill out the fields on the following page. In this example, under the Concerns field, you would tick the box that says Location and add any relevant notes in the Notes section. Once you have filled in all the fields, you can choose whether to archive that lead or not. This will depend on whether the client is still interested in the property or not. Click the Submit button once you have logged the update.
.png)
Copyright © 2023 Prop Data (Pty) Ltd Privacy Policy